A prop in the Sequencer allows you to define a single item that is in your display. This item could be simple, like a string of lights, or a wreath; or it could be complex, like a pixel tree or matrix. For every prop, you assign it a name and then define the type of lights that it uses, its shape, and its assigned channel(s).
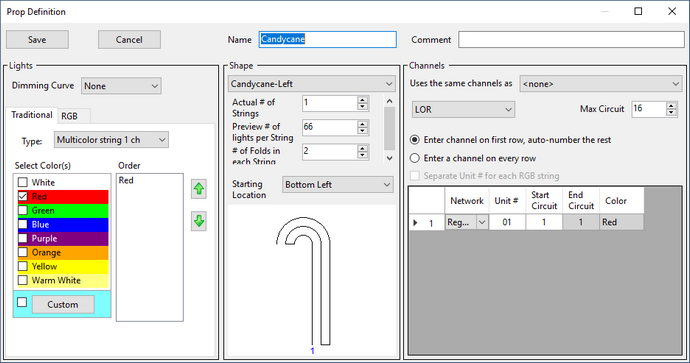
Name
Each prop must have a name. The name must be unique within the preview.
Comment
This is an optional field for you to make notes about this prop.
Lights Section
Use this section to define the types of lights your prop consists of.
Traditional
Choose the “Traditional” tab of the Lights section of the Prop Definition window to model strings of LEDs or incandescent lights or strobes. Colors for your string are defined on the left. Click the “Custom” button to choose a custom color. By default, the custom color is close to an incandescent warm white bulb.
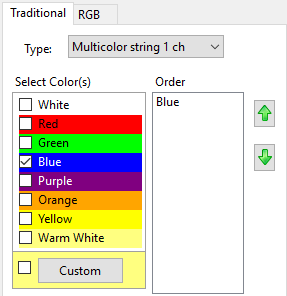
Set the “Type” drop-down as follows:
•Select “Multicolor string 1 ch” for single color strings or single color flood lights or a single string with various light colors. Choose the colors that make up the string.
•Choose “Channel per color” for bundles of single color strings (sometimes referred to as "superstrings"). Select color(s) for the strings on the left. For each color you choose, that color will show up in the “Order” list on the right. The Sequencer will assign one channel for each color that you choose. If the channels for these strings are numbered consecutively, it is recommended that you use the up and down arrows on the right-hand side to put the colors in the order that their channels are assigned (click on a color to select it, then use the arrow buttons to move it into the correct position). This way, the channels will be assigned correctly without any additional action.
RGB
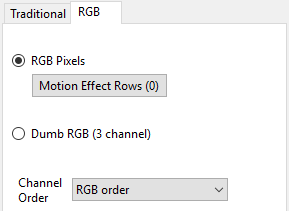
•Choose "RGB Pixels" for LOR Cosmic Color Devices and any other pixel strips, nodes, or bulbs. Use the "Motion Effects Rows" button to define default motion effect rows that will be incorporated into new sequences (this setting has no effect on existing sequences). The number in parentheses on the button reflects the number of default motion effect rows that have already been defined for the prop.
•Choose "Dumb RGB (3 channel)" for display elements that have a single red, green, and blue channel. This includes RGB floods and dumb RGB strips and nodes.
The channel order should be set to reflect the way the red, green, and blue channels are physically wired. If you are unsure, this may take some experimentation.
Shapes Section
Use this section to define how your prop looks on your computer screen during sequence playback. Defining the shape accurately is also very important for pixel-based props so that motion effects get displayed correctly.
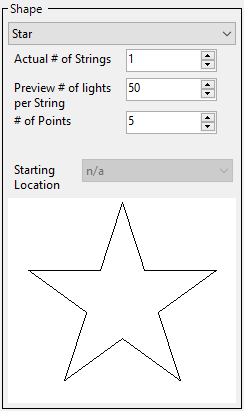
In the Prop Definition window, choose a shape that most closely matches your prop. Use "Lines-Connected", "Lines-Unconnected", "Lines-Closed Shape", or "Custom" to define a shape that isn't listed. Any shape can be resized and rotated, so you are not limited to the traditional orientation of the shape.
The description of the numerical entries in the middle of the shape section will change depending on the shape that is selected and type of lights (traditional, RGB pixels, or dumb RGB). Many shapes will require you to specify the number of lights in the prop (or in a section of the prop). For props with traditional or dumb RGB lights, this number can be an approximation -- set it to a value that looks good on your computer screen. For RGB pixels, the value must be the exact number of physical pixels.
At the bottom will be diagram of your shape primarily intended to show channel number orientation for props with multiple channels.
Channels Section
In the right-most section of the window you define the channels assigned to the prop. This section should be filled in last because the entries will change automatically based on the values you enter in the “Lights” and “Shape” sections. Take care to enter this information accurately, or your lights will not come on.
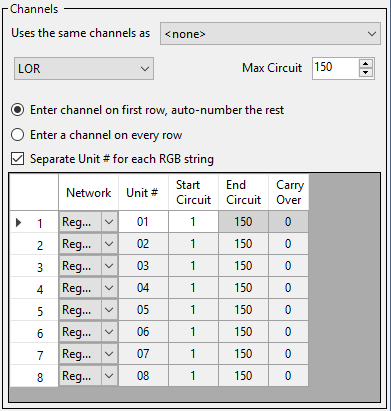
The Channels section
Uses The Same Channels As
Normally, you can leave this field set to "<none>". However, if you connect more than one set of lights to the same channel, then you can create a "Master prop" and one or more "sub props" to model this configuration. For example, if you have several candy canes that are all connected to the same channel and turn on and off together, then you can create one candy cane as the Master Prop. The master candy cane will have the "Uses The Same Channels As" field set to "<none>" and it will appear in the sequence grid (as an example, assume this prop is named "Candy cane master"). The other candy canes will be "sub props" -- the "Uses The Same Channels As" field will be set to "Candy cane master" and the props will not appear in the sequence grid. Should you change the channel(s) assigned to the master prop, it is up to you to also update the related sub-props. If you fail to keep them synchronized, you will get a warning on the Other Warnings tab in Preview Design.
Device Type
Select the device type from the drop-down that matches your hardware.
•Use "LOR" for Light-O-Rama controllers using the Light-O-Rama protocol (or enhanced protocol). Note that the PixCon16 controller can use the Light-O-Rama protocol or E1.31 (DMX) protocol -- so your Device Type selection on the Prop Definition screen needs to match the way you have configured the controller..
•Select “DMX” for controllers that connect via the E1.31 protocol over Ethernet or connect via a DMX USB adapter..
•A device type of “Undetermined” is available for situations where the device type is not known.
Max Circuit (or DMX Channel)
The number box at the top right defines how many channels are in each DMX universe or the maximum circuit number if LOR is selected. For DMX, you can leave this at the default value of 512, unless you have a controllers that does not allow an RGB pixel to cross universe boundaries. In this case, set the DMX universe size to 510 (170 pixels per universe).
Individual Start Channels
For the first string, you must provide the starting Unit ID and circuit (for LOR channels), or universe number and channel (for DMX channels). Subsequent strings will be calculated automatically. This works great for many situations, but there are exceptions. For those exceptions, click the “Individual Start Channels” check box. This will allow you to enter a starting Unit ID and circuit for every string.
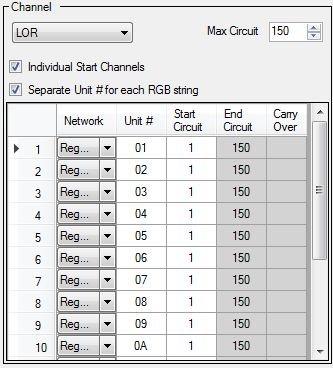
Separate Unit ID (or DMX Universe) for each RGB String
This check box will cause each string to start at circuit 1 of the subsequent Unit ID (or DMX Universe) from the previous row. If this box is unchecked, then each row starts from the last Unit ID and circuit from the previous row.