What's New in Light-O-Rama
A memory leak, which could affect any program using a sequence but which was most noticeable in the Show Player during shows that were using non-compressed sequences, has been fixed.
E1.31 protocol, also known as "streaming DMX over ACN", is now supported for DMX devices. This allows native DMX devices to be hooked up to LOR over an ethernet network, rather than over a serial port. Note that one or more E1.31 gateway devices, which convert E1.31 to standard DMX, would be required between your computer and your DMX devices.
New Network Configuration Program
A new program, the Light-O-Rama Network Preferences program, has been made. This program can be used to set up your various network settings, such as for your Light-O-Rama networks, DMX universes, X10 network, and so on.
This new program replaces the Sequence Editor's Network Preferences dialog. It can be launched through the Sequence Editor's Preferences menu, the Light-O-Rama Control Panel, or as a standalone Windows program.
Several efficiency improvements were made related to playing sequences, both at the startup of play and during play itself. These would be most noticeable on very large sequences, or sequences using many events on DMX channels.
New "Quick Vis" Files in SuperStar
SuperStar now has the ability to create "Quick Vis" files, which are simple visualizations, enabling you to use SuperStar's Instant Sequence feature without actually having a "real" visualization.
Improved Handling of Half-Ribbon Matrix Arrays in Imported Visualizations
SuperStar's handling of half-ribbon matrix arrays in imported visualizations has been improved.
Maximum Detection Rows Setting for Imported Visualizations
SuperStar's imported visualizations feature now has a new "maximum detection rows" setting, which enables you to control how many rows the lights from the visualization will be imported into.
Improved Error Reporting when Importing Visualizations
SuperStar's error reporting has been improved in situations when an error occurs while importing a visualization.
Change to Names of Channels in Exported Visualizations
When SuperStar would export a visualization sequence, the names of exported channels used to just be the names of the visualization's channels. Now they are the visualization channel names plus the visualization fixture names.
Morphs across Entire Sequencing Grid after Importing Visualization
After importing a visualization into SuperStar, the unused portion of a sequencing row is drawn in dim green and is selectable. This makes it possible to apply only one morph across the entire sequencing grid.
Can Select Individual Pixels in CCR Visualization in SuperStar
Individual pixels can now be selected in a CCR visualization in SuperStar.
New Mouse Selection Abilities in SuperStar Visualizations
You can now select in SuperStar visualizations using Ctrl-left click and Ctrl-drag.
Can Select Start and End Points of Morphs in SuperStar Visualizations
You can now specify the start and end points of a morph in a visualization in Superstar.
Start and End Marks of Morphs More Easily Identifiable
The start and end marks of a morph in SuperStar are now cyan and magenta to help identify them. Formerly, they were both white.
Dimming Curves in Exported Visualizations
When exporting a visualization in SuperStar, an LED dimming curve is used for CCRs and RGB devices, while an incandescent dimming curve is used for all other lights.
Support for Duplicate Fixtures in SuperStar Visualization Mode
SuperStar's visualization mode now supports duplicate fixtures.
Improved Instant Sequence Effects
The effects generated by SuperStar's Instant Sequence are now limited by the size of each sequencing row. This improves Instant Sequence effects to make them a bit more in sync and a bit less choppy.
Improved Balance across Comm Networks
The buffer size for writes to serial port devices has been increased, as has the associated timeout value. These changes improve balance across communications networks.
Arches with Less than Four Segments
The Visualizer's Arch Wizard previously wanted four or more segments; otherwise the arch would not actually look like much of an arch. It now appears more archlike even with less than four segments.
Default Grid Color in Visualizer's Options Dialog
The Visualizer's Options dialog now supports the default grid color option.
Cancelling Out of Visualizer's Wizard to Create Fixtures
The Visualizer's dialog to create fixtures now has a cancel button, giving the user the opportunity to cancel out of the process.
Increase Pointer Precision in Visualizer by Holding Shift
Holding the Shift key while moving the mouse in the Visualizer now reduces the cursor speed, thus making more precise cursor movements easier.
Move Only Horizontally or Vertically in Visualizer by Holding Ctrl
Holding the Ctrl key while moving the mouse in the Visualizer will now limit cursor movement to either horizontal or vertical, depending upon the basic direction the mouse was moving at the start of movement.
Suppress "Is this the port for shows?" in the Hardware Utility
When the user selects a different COM port in the "Manual Select" dropdown box of the Hardware Utility, the system asks if the newly selected port was "the LOR Show Port". If "Yes" was selected, the Regular network was set to use that port. A "Don't show this again" option has been added to that dialog, so that the user will not see it over and over, if desired.
"Color by Time" in Instant Sequence
SuperStar's Instant Sequence feature now supports a "color by time" option, which enables you to specify an absolute length of time (such as "four seconds") that it will take for effects in a theme to change color.
Too-Frequent SuperStar Warning Removed
When creating a new Instant Sequence in SuperStar, it would often give a warning about not being able to undo your action. This warning has been removed.
SuperStar Group Delete Efficiency Improved
SuperStar's group delete function has been optimized to be faster when deleting a large number of effects.
| • | Lock and Unlock on the Visualizer's right-click context menu were not working correctly. |
| • | The Visualizer incorrectly allowed for multiple unselected fixture/prop deletes when using the DEL key. |
| • | In SuperStar, shrinking a visualization to fit the screen would not always work correctly. |
| • | Various "import visualization" bugs were fixed in SuperStar. |
| • | If you imported a visualization in SuperStar, the first and last boxes on the first sequencing row would be set to white, yet if you tried to add a scene, you would get an error saying that no pixels were selected. This has been fixed so that no sequencing row boxes are selected after the import of a visualization. |
| • | When the Light-O-Rama Control Panel launched another program (such as the Schedule Editor), the program would start minimized. |
| • | When checking that the networks used by channels were configured, the Verifier would not check if the network was a DMX universe. |
| • | The first effect in a SuperStar Instant Sequence would not start out at the right color. |
| • | When doing an Instant Sequence on a visualization using SuperStar's Color Wheel, and a row of fixtures did not contain a color, there were cases where the row would not receive any visible effects for long periods of time. |
| • | In SuperStar's Import Visualization, there were cases where fixtures were not being recognized. |
SuperStar Supports Images and Text when in Visualization Mode
Images and text are supported in SuperStar while in Visualization mode. Note that it only makes sense to use images in text in a visualization if you have a grid of lights. To use text, the grid must be at least 5x5.
Timing Change in SuperStar's Forward and Reverse
When clicking on the Forward and Reverse buttons on the group of tape recorder buttons on SuperStar's toolbar, it now scrolls forward or backward one second (it used to scroll two).
Expanded WAV Support in SuperStar
If the header in a WAV file is of an unknown format, SuperStar now uses default values to open the WAV file. This is an unusual case, but it means that there are some WAV files that will now play properly whereas they would fail to play previous to this change.
Visualizer Can Make Itself Shown in front of All Other Windows
A new option, "Force Simulation Window to Front", has been added to the Visualizer's Com/Ref options tab (tab number 6). When this option is enabled, whenever the Visualizer receives data and is in Simulation mode, the Visualier window will force itself to be shown in front of all other windows. This option is off by default.
SuperStar's Export Limit Based on Number of Channels
When in visualization mode, SuperStar now limits export based on the number of channels instead of on the number of sequencing rows. For example, if you have a 2 CCR license, it will now allow export of up to 300 channels when in visualization mode.
Large Visualizations Shrunk to Fit in SuperStar
If a visualization imported into SuperStar is too big, it is now shrunk to fit within the screen.
| • | If in one of SuperStar's small views, sometimes the sequencing grid was too wide. |
| • | If a sequence were opened in one of SuperStar's small views, the numbers at the left of the time layers wouldn't display properly. |
| • | SuperStar's effect bar representing a scene for the star could have ended up being any color. This has been fixed so that the bar is always white. |
Setting SuperStar's Color Control for Images
When drawing an image in SuperStar, you can set the color of the color control to the color of an image pixel by holding the Shift key and left-clicking the pixel with your mouse.
Support for Cosmic Color Bulb devices has been added to the Sequence Editor's Insert Device screen (in the Cosmic Color Device section) and to the Hardware Utility's CCR/CCB Configuration screen.
Support for Flipped Cosmic Color Strings in Insert Device
Cosmic Color Devices have a hardware setting option where the pixel numbers can be "flipped" - i.e. instead of pixel #1 being closest to the device and pixel #50 being furthest from it, pixel #50 is closest and pixel #1 is farthest. The Sequence Editor's Insert Device screen's Cosmic Color Device section now has an option to list RGB channels in the device being created from 1 to 50 or from 50 to 1, so as to more easily match up the sequence as shown on the screen with the actual hardware device.
| • | In SuperStar, sometimes the length of an archive file would become five minutes instead of the length of the original audio file. |
| • | In the Visualizer, if the user pressed the Enter key on the Prop Properties screen, the last fixture selected to be part of the prop may not have been saved correctly. |
| • | When using the Visualizer's Prop Properties box, the system could occasionally throw a logged error. The system correctly recovered, but the error should not have happened in the first place. |
| • | When using the Visualizer's Channel Wizard on RGB props along with a reference file with RGB channels, the second and subsequent fixtures assigned to the prop could have incorrect channel assignments. |
| • | In SuperStar, sometimes if you modified the image an an image action and then played the sequence, it would hang. |
Play Startup Speed Improved in the Sequence Editor
The amount of time that the Sequence Editor takes to start playing a sequence has been reduced (this is most noticeable on very large sequences).
The names of various file types that SuperStar creates have been changed: Export files are now "_sup.lms" instead of ".sup.lms"; vis files are "_vis.lms" instead of ".vis.lms"; archive files are "_archive.lms" instead of ".archive.lms". Also, exported files are named ".lms" regardless of whether they have an associated media file, with the expectation that the user will soon add a media file to them.
SuperStar Exported Timing Grid Changed
The timing grids of sequences exported from SuperStar have been changed from 0.10 seconds to 0.05 seconds.
| • | If you chose a color such as yellow-white in SuperStar's instant sequencing in CCR mode, you would only see occasional yellow. |
| • | In some cases, when "loop at end" was on and the play range started close to the end of the sequence, play would not start properly in the Sequence Editor. |
| • | On some Windows 7 computers, every time the Visualizer was started, it would ask the user if they wanted to associate .LEE files to the program. |
Running Sequences Displayed in LOR Control Panel
During a show, the LOR Control Panel's status window now shows information about the various sequences that are running.
The LOR USB485-ISO is now officially supported for use as a DMX adapter. It should use the "Raw DMX" protocol.
Simple Show Builder Defaults to "All Files"
When selecting the sequences to use in the Simple Show Builder, the user is given a choice of which sequences should be displayed so as to be able to choose from: "16 Channels", "32 Channels", and "All Files". The first two are not really based upon the number of channels in the sequence; rather, they are based on the name of the file (for example, if "16 Channels" is selected, all files with "16" in their names are displayed).
Previously, the default would be "16 Channels". Since many people make sequences without any having "16" in their filenames, this would result in a blank list being displayed, often leading to confusion as to why the Simple Show Builder was not listing the sequences. To prevent this, the Simple Show Builder now defaults to "All Files" instead of "16 Channels".
If you load a SuperStar sequence file and then import a visualization, the filename of the SuperStar sequence file is changed to end with ".vis.sup" instead of ".sup". For example, a SuperStar sequence named "AwesomeSequence.sup" will be changed to "AwesomeSequence.vis.sup" upon importing a visualization.
SuperStar ".archive.sup" Files
If a SuperStar sequence file's name ends with ".archive.sup", SuperStar will not let you change the file using "Save". Instead, it will prompt you to use "Save As". If you then use "Save As", it will rename the file to not have "archive" in the name. This is to help prevent changing an archive file.
New Option for Creating Trees in the Visualizer
The Visualizer's Tree Wizard can now also create trees that start at the center pole and go to the base. Previously, it could only create trees where the initial point was on the base.
Effect Type Options for the Tail of a Morph in SuperStar
When doing a morph in SuperStar, you can now do a shimmer or a twinkle on the tail of the morph.
Added Group Modify for Scene Effect Type in SuperStar
"Modify Effect Type" was added as a check box in SuperStar's Scene Group Modify dialog box. Previously, you could set the effect type individually, but could not set it to a group.
Updating Visualizer Channels by Name
When using a reference file, the Visualizer now gives you the option to update channels based on the channel's name or the channel's key. Previously, the only update available was "by key". Now when updating by name, the Visualizer can update the Device, Network, Unit, Circuit, and Channel Color to what was loaded in the reference file(s). Updating by name will help those people who change the physical layout of their channels.
SuperStar Supports DMX for Visualizations
Previously, SuperStar supported only Light-O-Rama controllers for imported visualization files. DMX is now also supported.
SuperStar Supports Multiple Networks for Visualizations
Previously, SuperStar supported only one network for imported visualization files. It now supports multiple networks.
Visualizer from the Command Line
The Visualizer can now accept filenames on the command line. If you specify a filename on the command line, the Visualizer will attempt to load it, skipping the "On Startup..." option. If it is not successful, the "On Startup..." option will be used.
Visualizer Files Registered with Windows
The Visualizer now registers the ".lee" filename extension with Windows, so if you double click a .lee file in Windows, the Visualizer will start and load that file automatically.
Paste Multiple Can Paste to the End of a Group
When selecting the number of times to paste vertically, the Sequence Editor's Paste Multiple dialog used to give a choice between pasting an explicit number of times (such as 3 or 7) and "Paste all the way to the end of the sequence", which would paste vertically as many times as it took to get to the last channel in the track. It now also gives the option to paste to the end of any channel group or groups that contain the first channel being pasted to.
Sequence Editor Remembers the Directory of the Last Sequence Opened or Saved
When a sequence is opened or saved in the Sequence Editor, the Sequence Editor now remembers the directory of the sequence, so that the next time a new sequence is saved, or the next time the Existing Sequence tab of the New and Open dialog is used, it will default to that directory.
Ending Drawing via the Keyboard
Previously, the only way to end a drawing in the Visualizer's editing window was to double click. You can now also end a drawing by pressing either the End key or the Enter key.
Tooltips for Channel Group Expander Buttons
In the Sequence Editor, if you hover your mouse over the expander button for a channel group (the small "+" or "-" button to the left of a channel group button), a tooltip will pop up saying the name of the channel group it is for, and whether left-clicking on the button will cause the group to expand or collapse.
Control Panel Remembers Whether Schedule Is Enabled or Not After Shutting Down
The LOR Control Panel has always had the ability to start up automatically upon the computer being started (and the Windows user logged on), and if the schedule had been enabled when the computer was shut down, it would automatically enable the schedule upon being started as well. However, if the Control Panel were unloaded via "Unload Light-O-Rama", it would not automatically enable the schedule upon being started again. Now, when it is started up, it enables the schedule or not based on whether or not it was enabled the last time it had been running.
| • | In SuperStar, exported CCR sequences have the RGB values "balanced" so that the colors on the actual CCRs match the colors on your computer screen (think of this as a color correction made to the RGB values). This was being done when in CCR mode, but when in visualization mode, exported CCRs were not having their RGB values balanced. |
| • | A SuperStar scene that used the Twinkle effect did not show that effect on the computer screen (note that the effect did happen on the actual CCRs themselves). |
| • | After selecting effects in SuperStar, Ctrl-C would not copy the effects that you had just selected. |
| • | If you created a SuperStar sequence in CCR mode using the star, and then imported a visualization, the channels for the star did not appear on the sequencing grid, and made it impossible to change the star channels. |
| • | If two different effects in SuperStar attempt to control a channel at the same time, SuperStar throws out the shortest command. However, this was not being done for the commands in an exported sequence. The result was that sequences with overlapping channel commands played back differently in SuperStar than they did from an exported sequence. |
| • | After using a wizard, the Visualizer would correctly show Prop mode. However, pressing the "Fixture" button on the main screen sometime did not correctly change into Fixture mode. |
| • | Pressing the "Default" button on the Visualizer's Tree Wizard could incorrectly set the number of pixels per segment, which could then cause an error. |
| • | If you make a selection in SuperStar's star channel grid, selections in the CCR channel grid will be cleared, and vice-versa. Previously, the existing selection would not be cleared, which could lead to confusing effects. |
| • | In SuperStar, if you loaded a sequence with timings, and then loaded one without timings, the timing map would get stuck in Imported Timings mode, and attempting to set the frequency spectrum would not work. |
| • | If you loaded a channel configuration file as a reference in the Visualizer, and then chose to update existing channels, the channel colors for matching virtual channels could be set incorrectly. |
| • | When "Disable Shows Immediately" was done in the LOR Control Panel, the lights on native DMX universe devices would not be turned off. |
| • | If the Sequence Editor's "Channel Button Colors" setting were set to anything besides "None", the color of the channel buttons' fonts would vary during play even if "Vary Color of Channel Button Fonts" were turned off in the Play Preferences dialog. |
| • | The Sequence Editor's Edit menu's keyboard shortcut for Set Paste Mode was changed from M to O, because M was already in use for Paste Multiple, which led to it being impossible to open the Set Paste Mode menu via the keyboard. |
| • | After a "Disable Shows Immediately" was done in the LOR Control Panel, in some cases a message would appear in the status log saying "tmNextAction_Timer Error: Object variable or With block variable not set". |
| • | When selecting a show file to schedule in the Schedule Editor, the "file type" dropdown box of the file browsing dialog would allow either "Show Files" (which was the default) or "All Files". Selecting "All Files" would allow you to schedule some sort of file other than a show file, which would not accomplish what you were hoping (since the Show Player only supports scheduled shows, not any other sort of scheduled thing). The Schedule Editor now only allows you to schedule shows. |
| • | If a track were hidden, and that track were selected from the Sequence Editor's track dropdown list (in the Tracks and Timings toolbar), the track would become the active track (as it should), but it would remain hidden and the display would not move to show it. |
| • | In SuperStar, if you imported a visualization file and picked a recent file to open such as "Untitled.sup", the program would advise that it changed the name to "Untitled.vis.sup". However, if you do a Save As, the name would default to "Untitled.sup" instead of "Untitled.vis.sup". |
| • | When exporting a file in SuperStar, if you typed in a name such as "MySequence", it would give an error saying that the file name has to end in ".lms" or ".las". This has been fixed so that the appropriate file extension automatically gets appended to such a file name. |
| • | In SuperStar, an image that was moved a short distance would stay on the screen too long. |
| • | In SuperStar, if you added some macros, selected those macros, deleted them, and then tried to undo the group delete, they would not get restored. Also, if you selected a group of effects that include some macros and did a group delete, it would not always undo properly, and in some cases would cause SuperStar to crash. |
| • | Sometimes when importing a visualization file that contained RGB fixtures into SuperStar, the channels for that fixture were not red, green, and blue. |
| • | The controller for the star in SuperStar was always being placed in the Regular network; it can now be placed in any network. |
| • | If the Visualizer attempted to load a file that previously existed but was now missing, the error message presented was not clear. The error message now explicitly says that the file is missing, rather than the generic "XML error". |
| • | If you deleted the currently displayed timing grid in the Sequence Editor, it would continue to be displayed until you manually displayed another. |
| • | When exporting a SuperStar sequence, if the name of the media file contained the "&" character, an error would occur when trying to load the exported sequence in the Sequence Editor. |
| • | When saving a morph in SuperStar, the end intensity level for white was always the same as the start intensity level for white. |
| • | In some situations, as the Show Player was starting (after having enabled shows), the LOR Comm Listener would shut down. This would happen when the Show Player took longer than the Comm Listener would expect to start up, which might happen, for example, if the computer had the third-party Universal Library and InstaCal installed for controlling digital IO cards. The Comm Listener now gives the Show Player a longer amount of time to start up before deciding to shut itself down. |
| • | On some computers, the LOR Comm Listener would occasionally get in a state where it would shut down and then restart over and over, fairly rapidly. A change was made to fix this in at least some situations. |
| • | In SuperStar's Timing Map dialog box, if you deselected "Also Set TCM" and changed the TCM settings, it would set the TCM settings back to what they were before you changed them. |
| • | Ball Tree (RGB light strings where the color of the whole string of lights changes together) was not playing back properly in SuperStar. |
| • | In the Sequence Editor, if "Loop at End" is turned on, and the play range includes the end of the sequence, and the sequence is a musical sequence, the loop would be done back to the beginning of the sequence rather than to the beginning of the play range. |
| • | If a sequence contained more than one channel, then on the Channel Configuration screen, the tab key would move the focus from control to control in a strange order. |
| • | When you zoomed channels in or out in the Sequence Editor, any channel group expander buttons on the screen would not be redrawn into their proper new positions until you did something like hover over them. |
| • | In some situations, a clipboard removed from the Sequence Editor would still be partially visible in the list of clipboards, leading to errors if it were selected. |
| • | In most cases, the LOR Control Panel would slowly leak memory resources, eventually leading to strange behavior such as shows stopping or crashing. |
| • | SuperStar could crash at startup time. This has been fixed. |
Expand All and Collapse All for Channel Groups
In the Sequence Editor, clicking on a channel group's expander button expands or collapses the channel group - that is, it makes the channel group's children visible, or hides them. In addition to this, now you can expand or collapse the channel group and all of its descendents:
Holding the Shift key while clicking on a collapsed group will expand it and all of its descendants except for RGB channel descendants; holding both Ctrl and Shift while clicking on a collapsed group will expand it and all of its descendants including RGB channel descendants.
If the group is expanded, holding Shift (or both Ctrl and Shift) while clicking will collapse it and all of its descendants.
The LOR USB485B and the Lynx adapters are now officially supported for use as DMX adapters. The LOR USB485B should use the "Raw DMX" protocol, and the Lynx should use the new "Lynx" protocol.
Performance of ENTTEC DMX USB Pro Adapters Improved
One of the supported adapters for native DMX devices, the ENTTEC DMX USB Pro, is capable of offloading some CPU utilization from the computer driving the DMX devices through it. Previous versions of Light-O-Rama did not take advantage of this capability, but it does as of this version.
Scrunching the SuperStar Sequence Grid for Imported Visualizations
A new option has been added to SuperStar's Import Visualization dialog, allowing you to "scrunch" the sequencing grid for your visualization. This allows you to pack the most light fixtures possible into each sequencing row. For example, if you have the 2 CCR license level, and you are getting an error message saying that your visualization can only have 2 green sequencing grid rows or less during export, then you can try importing your visualization again and selecting the "Scrunch the Sequence Grid" option, then try exporting again.
Instant Sequencing with Imported Timings
Previous to this release, in SuperStar, you could import timings, but could only use them for visual reference. They can now be used to create an instant sequence. You can import up to three timing channels, which will become the top three timings. After importing timings, if you open the Timing Map dialog box, you will see that the "All Freqs" row of timings has been renamed to "Imported".
Increased Limit on SuperStar's Number of Fixtures per Prop
SuperStar's limit on the number of fixtures allowed in a prop has been increased from 32 to 64. This brings the limit up to the same limit as in the Visualizer.
SuperStar Exports Grouped CCR Devices
SuperStar now exports CCRs as grouped CCR devices. This makes it much easier to see the entire sequence in the Sequence Editor.
Sample SuperStar Clipboard Files Added
Twenty new sample system clipboard files have been added to SuperStar. Click on the Edit menu and select "Load/Save Clipboard", and you will see the new files, such as "Sys - BubblesRiseAndPop.scb", "DiamondExpanding.scb", and "Sys - SharkFinForHorizontalRibbons.scb". To use one, select it from the list, click on "Load Clipboard from File", and then click on "Paste". The effects will be pasted into your sequence starting at the time you have selected.
| • | When using the Visualizer's "Insert Fixture from Symbol" command, the symbol inserted may have been missing a segment from the last point defined back to the first. |
| • | When starting a simulation in the Visualizer with more than 255 virtual channels, a warning is now shown that only the first 255 will be used. |
| • | The Visualizer now prevents errors when loading images that are too large, or starting a new simulation with a blank background that is too large. The absolute maximum size is now 2500x2500. |
| • | If you cancelled the creation of a new visualization in the Visualizer, you would incorrectly be prompted for a save filename. Since no visualization was created, there was nothing to save. |
| • | If you loaded a file with a bad signature into the Visualizer, any new file created in that session could also be marked as bad. |
| • | Depending on the size of fonts in Windows, text in the Visualizer's Options dialog may have been cut off. |
| • | In some situations, using certain keyboard functions (such as Ctrl-Z to undo) in the Sequence Editor would cause the display to jump to another location (such as to the bottom of the channel list). |
| • | The Visualizer's Channel Wizard did not correctly assign channels when using the DMX device type. |
| • | In some cases, if an error occurred while the Visualizer was loading a prop file, existing prop and fixture data could be corrupted. |
| • | Importing a channel configuration file would fail if one of the channels in the channel config file was a subsequence and that subsequence's sequence file was missing or otherwise unloadable. |
| • | In the Tapper Wizard, if "Insert a timing into the timing grid for each tap" were checked, and "Insert effects into a channel" were unchecked, and taps were collected and then applied to the sequence, starting over with new taps would not be able to collect more taps than the originally collected number unless the Tapper Wizard were exited and reopened first. |
| • | The Sequence Editor would crash if a port number greater than 32767 were entered into the Visualizer Preferences dialog. |
| • | For large audio files (for example, an audio file that is half an hour long), the Beat Wizard, VU Wizard, and Waveform Display would sometimes fail with an error saying that memory could not be allocated. |
| • | In the Sequence Editor, when pasting from a saved clipboard which happens to be locked, the clipboard would automatically unlock. |
| • | When exporting a file in SuperStar, if the audio file was an MP3 file, the filename would get exported as SSEditAudioFile.wav. This has been fixed to use the MP3 audio file name. |
| • | SuperStar's effect bars in the time layer were sometimes white when they were supposed to be colored. |
| • | In SuperStar, Light-O-Rama controllers were assumed to never have more than 16 channels. They can now have up to 512. |
| • | Orange, yellow, and purple lights were not being sequenced by SuperStar's Instant Sequence feature. |
| • | SuperStar was not handling duplicate channels in a visualization (i.e. channels that are assigned to more than one light fixture). Now, they are displayed in dark gray, and cannot be selected or sequenced. |
| • | SuperStar was not properly detecting rows in visualizations with props that do not contain any lights. |
| • | SuperStar was not exporting macro commands when in visualization mode. |
| • | If you load and play an audio file in SuperStar, then open and play a sequence using the same audio file in the Sequence Editor, you could get an error in SuperStar saying to shut down the other program. If you then shut down the Sequence Editor, and try to play the audio file again, it would not play (even if you tried to load the audio file again). |
| • | SuperStar's Configuration Dialog box previously listed "Unit Nbr" and "Unit ID". A controller's "Unit Nbr" was the decimal number that equated to the controller's unit ID (which is a hexidecimal number). This ended up being confusing, and so now only the unit ID is listed. This is now consistent with the rest of the Light-O-Rama software suite. |
| • | When the Hardware Utility scans for connected controllers, it could confuse CTB16PC, CCF, and CCB100 controllers with each other. |
The Light-O-Rama Visualizer is a new program in the Light-O-Rama software package. It is intended to give a visual representation on your computer screen of how your lights will look during a sequence or during your show.
Please note that the Animator, which has a similar purpose, is still supported, so that existing sequences continue to work with it. However, the Visualizer is more fully featured than the Animator, so consider using the Visualizer instead of the Animator, especially for new sequences.
The Light-O-Rama SuperStar Sequencer
The Light-O-Rama SuperStar Sequencer is a new program in the Light-O-Rama software package. It can be used as a sort of front end for the Light-O-Rama Sequence Editor, creating sequences visually rather than via a channels-versus-time grid.
Note that existing Light-O-Rama licenses do not cover SuperStar (except in demo mode). In order to fully use SuperStar, your license will have to be upgraded to have SuperStar support.
The Insert Device dialog can now optionally create devices as channel groups, instead of as raw channels and/or RGB channels. A channel group is a set of channels and/or RGB channels that can be collapsed down to a single row in the display, or expanded to show rows for all (or some) of its members.
Light-O-Rama now supports control of native DMX devices.
Note that only the Advanced license level supports this.
The new Paint Sequence tool can be used to paint effects from another sequence into the current sequence. This can be used to accomplish things similar to what can be accomplished with subsequences, in a potentially clearer and easier way, without the extra complication of subsequences.
It may take a significant amount of time to load a large Light-O-Rama sequence. When loading one in the Sequence Editor, in order to view or modify it, this may be an inconvenience, but the real issue is loading one in the Show Player: When the Show Player has to load a large sequence, it may cause a noticeable pause in your show as the sequence loads.
To resolve this issue, this release of Light-O-Rama introduces the concept of compressed sequences. A compressed sequence is a separate save file, associated with a a sequence but containing only enough information to play the sequence in the Show Player, and optimized for loading speed. This can speed up loading times dramatically - for example, for a certain large sequence that takes eight seconds to load on a certain computer, the associated compressed sequence only takes a small fraction of a second to load on that same computer.
Variables in Windows Shell Commands
In previous versions of Light-O-Rama, the Windows shell command associated with a sequence was a static thing - it would be executed exactly as you had typed it. Now, they are instead templates; you can type in pieces that will be executed exactly as you typed them, just as before, but you can also type in variables, which will be replaced with run-time information, such as the name of the song that is being played.
The Sequence Editor previously offered two different modes for pasting: paste by cell and paste by time. There are now two additional new modes: stretch to fit and repeat to fit. Stretch to fit stretches (or compresses) the copied effects so that they fit into the area that you select, while repeat to fit repeats (or cuts off) the copied effects so that they fit into the area that you select.
Gen3 Light-O-Rama Controllers, and pre-Gen3 LOR controllers with Gen3 firmware installed, support customizable dimming curves. A dimming curve determines the output of a circuit from the intensity setting sent to that circuit; for example, some pieces of hardware (such as strobe lights) should never be dimmed, and so a dimming curve can be set for such a device that sets the output at 100% for any intensity of 50% or above, and at 0% for any intensity lower than 50%. Another example is that different types of bulbs (such as incandescents versus LEDs) may naturally get brighter or dimmer at different rates when going from one intensity to another, and so different dimming curves can be used to even them out, making fades on them appear more similar to each other.
You can control what dimming curve is used for what circuit via the Hardware Utility's new Advanced Configuration screen.
Hide or Unhide a Track by Left-Clicking Its Track Bar
In previous versions of the Sequence Editor, both left-clicking and right-clicking on a track's track bar would cause that track bar's popup menu to open. Right-clicking still does, but left-clicking now instead hides or unhides the track.
Select Columns or Rows via the Right-Click Context Menu
In previous versions of the Sequence Editor, you could select an entire row or rows, or an entire column or columns, via the Edit menu's Select Rows and Select Columns menu items. Now, you can also do this via the right-click context menu.
The Sequence Editor can now be used to create protected sequences, which are sequences whose sequence grids cannot be viewed or (generally speaking) modified, but which can still be played, control lights, be scheduled in shows, and so forth.
Control Over Channel Button Colors While Not Playing
In previous versions of the Sequence Editor, while a sequence was not playing, channel buttons would be displayed as grey (or black for RGB channels). Now, it still operates that way by default, but the Channel Button Colors submenu on the View menu gives you two other options: to be displayed using the channel's full color, or to be displayed using the channel's color at the time of the start of the current selection.
Reversing Pixel Order in CCRs/CCBs
The Hardware Utility's CCR/CCB Configuration screen now supports reversing the pixel order of a Cosmic Color Device (so that pixel 50 is closest to the controller, rather than pixel 1).
The behavior of keyboard keys in the Sequence Editor can now be configured, via the new Keyboard Preferences dialog.
Effect Tools' Keyboard Shortcuts Shown in Toolbar Tooltips
If one of the effect tools on the Tools toolbar has a keyboard shortcut that applies that tool, and only applies that tool, it is displayed in the tooltip for that effect tool's button on the toolbar.
Several View Settings for Sequences Are Now Persistent
In the Sequence Editor, several view settings for sequences are now persistent. That is, for example, if you change the width of the channel buttons for a sequence, they will automatically be that size whenever you open that sequence in the future (unless you explicitly change their size again).
This information is automatically remembered outside of the sequence file itself (but associated with it), so you do not have to save the sequence file when you make a cange to such a setting. Also, there had been some such settings which already were persistent, but used the sequence file, so that you would have to save the sequence whenever you altered them; these now are instead automatically persisted outside of the sequence file.
The following view settings are now persisted in this manner:
| • | The width of the channel buttons |
| • | Whether the channel buttons are displayed or not |
| • | The height of a row of the grid (and of the channel buttons) |
| • | The zoom setting of the Animator |
| • | Whether the Animator's controls are shown or hidden |
| • | The zoom level of the waveform display |
Tools Panel Can Be Completely Hidden
The Sequence Editor's Tools Panel can now be completely hidden, so that not even the narrow bar with its wrench icon is displayed, via "Tools Panel" on the View menu.
Control Over Channel Names in "Insert Device"
The Sequence Editor's Insert Device dialog used to give no control over the names of the channels that it would create. You can now specify the base name (such as changing the default "SD" for a Servo Dog device to "Animatronic Rudolph", resulting in channel names like "Animatronic Rudolph 03.7" for unit 03 circuit 7 instead of "SD 03.7"). You can also specify that the unit ID should not be included at all (resulting, for example, in "Animatronic Rudolph 7" for circuit 7).
Channel Names in "Insert Device" Indicate Network for Auxiliary Networks
When creating channels, the Sequence Editor's Insert Device dialog would not include any indication of the channel's network in the channel's name. For example, a channel for unit 03 circuit 7 of a Servo Dog device would be called "SD 03.7" no matter what network it was on. Now, if the channel is on an auxiliary network, it will additionally include that network's identifier. For example, "SD C03.7" would indicate that the channel is on the Aux C network, while a plain "SD 03.7" would indicate that the channel is on the regular network.
Subsequences Changed on Disk Automatically Reloaded
If a sequence containing a subsequence was loaded, and then the subsequence was changed and saved, and the parent sequence then played, it would play as if the subsequence had not been changed. It will now instead play using the newly saved contents of the subsequence.
Additional Clipboard Management Capability
In previous versions of the Sequence Editor, if a saved clipboard were changed, the changes would automatically be resaved when the Sequence Editor was closed. This is still done, but there is now a new menu item on a clipboard's popup menu to manually resave it, and an option on the Clipboard Preferences menu to automatically resave. Similarly, there is now a new menu item to reload a saved sequence (in case the contents of its save file were changed outside of the Sequence Editor), and an option on the Clipboard Preferences menu to do so automatically. These changes are intended to ease the use of clipboards by third party tools.
Additionally, a new menu item to remove a clipboard from the list of clipboards has been added.
The channels of a track can now be locked, meaning that you will be unable to add channels to the track, remove channels from it, move channels within it, or modify settings (such as device type and unit) within it, unless you unlock the track first. To lock or unlock a track, use "Lock Track" (or "Unlock Track") from the track bar's popup menu.
Additional Info in Channel Button Tooltips
In previous versions of the Sequence Editor, the tooltip that would open when the mouse hovered over a channel button would show the name of the channel. It now shows additional information, such as the unit and circuit.
Sequence Grid Tooltips Show Channel Button Color
In the Sequence Editor, the tooltip that opens when the mouse is hovered over the sequence grid now displays the color of the channel of the row that the mouse is hovering over.
This new behavior can be turned off via "Use Channel Colors" in the Display Preferences dialog.
Time Ranges in Beat Wizard and VU Wizard Automatically Set to Play Range
In previous versions of the Sequence Editor, when the Beat Wizard or VU Wizard was opened, it would automatically be set to operate on "the entire song". It will now instead be automatically set to operate on the play range (the freeform play range if one exists, or the play range as set on the Play menu if not).
Note: This behavior can be overridden, for these wizards and also the Tapper Wizard, via the "Use Play Range for Wizards" option on the Play Preferences dialog. If this option is not enabled, then the wizards will default to using the time range of the entire song.
VU Wizard Shows Percent of Time above Threshold
The VU Wizard now displays the percent of time that is above the specified threshold, with the specified settings.
New "Change Controller" dialog
The new Change Controller dialog (which can be accessed from the Channel Configuration screen) presents a list of the controllers in a track, and allows you to select one and change its physical settings. For example, you could use this dialog to quickly change all channels for the Light-O-Rama controller 03 on the Regular network to instead be controller 07 on the Aux C network. Note: The "Channel Configuration" screen used to be known as the Channel Property Grid.
Add Controller Dialog Allows Selection of Network
The Channel Configuration screen's Add Controller dialog now allows the network of the controller to be selected (for those device types that have networks). Note: The "Channel Configuration" screen used to be known as the Channel Property Grid.
Additional Mouse Scroll Wheel Support
The mouse scroll wheel is now supported in the Schedule Editor and in the Sequence Editor's Channel Configuration screen. Note: The "Channel Configuration" screen used to be known as the Channel Property Grid.
Sequence and Track Names are Printed
When the "Print" function is used in the Sequence Editor's Channel Configuration screen, the printout now includes the name of the sequence and of the track. Note: The "Channel Configuration" screen used to be known as the Channel Property Grid.
Control Panel's Menu Reorganized
In previous versions of the Light-O-Rama Control Panel, some of the menu items on its popup menu were paired with each other. For example, to control whether or not the Control Panel should be automatically launched whenever the computer starts up, there was a "Launch at startup" menu item and also a "Do not launch at startup" menu item. This could be a bit confusing, as the way that you could tell (for example) that the Control Panel would be launched at startup was that the "Launch at startup" menu item was greyed out, so that you couldn't select it.
Now, instead, such pairs have been replaced by single menu items, which can be checked or unchecked. For example, if "Launch at startup" is checked, the Control Panel will launch at startup, and if it is not, it will not; there is no longer any "Do not launch at startup" menu item.
Performance of "Repeat" Improved
The Sequence Editor's "Repeat" function is now quicker than it used to be, and also uses less memory than it did.
Memory Usage of Undo Recording Improved
The Sequence Editor now uses significantly less memory than it used to in order to record events for later undoing/redoing.
Verifier Speed Improved for Channel Conflict Check
One of the possible issues that the Light-O-Rama Verifier can check for is whether a sequence has two different channels with the same physical settings (such as unit and circuit). In the past, this check could take quite a while to perform on large sequences; it has now been speeded up considerably. For example, for a certain sequence, the Verifier running on a certain computer would need ten minutes to perform this check. It now needs only about a second, for the same sequence on the same computer.
"Channel Property Grid" Renamed to "Channel Configuration"
The Channel Property Grid has been renamed to "Channel Configuration".
| • | The tooltip for the Sequence Editor's "Custom Shimmer" button was inappropriately labeled. |
| • | If multiple sequences were open in the Sequence Editor, and they were not maximized, switching from one sequence to another by directly clicking on a sequence would correctly activate that sequence, but would not update the row of sequence tabs to show that that sequence is now active. |
| • | A bug in an earlier Beta release of the software, which was not released to the general public, would sometimes cause a sequence to accumulate "extra" RGB channels, which were not present in any of the sequence's tracks. These RGB channels weren't noticeable to a user, and they would not affect the behavior of the lights, but their presence in a sequence could cause certain operations, such as deleting channels, to be much slower than normal, for that particular sequence. Such operations have now been sped up. |
| • | Clipboards that were loaded from saved clipboard files would always paste as if "Paste from foreground" was enabled. |
| • | If both the Sequence Editor and the active sequence were maximized, and neither vertical scroll bar (the one to scroll between tracks and the one to scroll within a track) were present, and the program was running on the rightmost monitor, then when selecting an area by clicking and dragging, you would be unable to scroll to the right while selecting. |
| • | When loading a clipboard, if you selected the clipboard file's name by double clicking it in the file browsing dialog, and the mouse happened to be over a sequence, then after the clipboard loaded, a phantom mouse click would be applied to the sequence. So, for example, if the Fade Up tool was selected, a fade up would be applied to the spot on the sequence where your mouse happened to be. |
| • | The Delete Controller dialog used to be unable to distinguish between different LOR controllers that happen to have the same unit ID on different networks. |
| • | If a show has a jukebox interactive group, and the trigger associated with that group is pushed while a sequence from that group is playing, the trigger should not cause the sequence to be interrupted and the next sequence in the group to be played. This worked fine. However, it would cause the sequence that is considered to be "next" to be changed. For example, if the group contains three sequences, A, B, and C, and A is playing when the trigger is pushed, A would continue playing (as it should), but after A ended, if the trigger were pushed again, C, not B, would play. |
| • | When creating a new musical sequence, if you set the number of channels to zero, and then specify that the channels should be created via a channel configuration file instead of via the specified number of channels, the Sequence Editor would tell you that you need to specify more than zero channels, and then crash. |
| • | In the Sequence Editor, when the time range of a track is scrolled, the time ranges of any other tracks in the sequence should scroll with it. However, this did not occur unless those other tracks had already been displayed at least once since the sequence was loaded or created. It also would not occur during play except when those other tracks were displayed. |
| • | On the Hardware Utility's LOR MP3 tab, if no MP3 controller were connected, the "Set" button (to set the unit's time) should be greyed out. In most cases, it was, but if no comm port existed (as opposed to merely no comm port being selected) it was not greyed out, and so could be pushed. Pushing it in such a situation would result in a crash of the Hardware Utility. |
| • | When the track list of a sequence is changed in the Sequence Editor - for example, if a track is moved to another position - any tracks that had been hidden would automatically unhide. |
| • | In the Sequence Editor, when a file was chosen from a file browsing dialog by double clicking on the file, sometimes the sequence grid that was "beneath" the dialog would act as if it had been clicked. For example, an effect tool might be applied to the grid, or a Channel Settings dialog would open. |
| • | If a track was hidden, moving it up in the list of tracks would cause it to become the first displayed track. |
| • | If a clipboard was saved in the Sequence Editor, and the clipboard's name was invalid in certain ways, the Sequence Editor would crash. |
| • | If an iDMX1000 controller was selected in the Hardware Utility's Test Console, the "Current Channel Range" display would be incorrect. |
| • | The "Move to Track Number..." menu item on a channel button's popup menu was enabled even if there was only one track. |
Up to Sixteen Light-O-Rama Networks Supported
Previous versions of Light-O-Rama could support Light-O-Rama controllers on up to four different networks ("Regular", "Aux A", "Aux B", and "Aux C"). This has been increased to sixteen (in addition to the original four, "Aux D" through "Aux O").
Old MC-P Only Affects the Regular Light-O-Rama Network
Old MC-P compatibility mode is required if you have certain old Light-O-Rama controllers (MC-P controllers purchased prior to November 15, 2003). This compatibility mode causes significant overhead on the communications protocol. In previous versions of Light-O-Rama, if you turned on Old MC-P compatibility mode, it would affect all of your Light-O-Rama networks. Now, instead, it only affects the Regular Light-O-Rama network; it does not affect any auxiliary Light-O-Rama networks. So, you can now put all of your old MC-P controllers on the Regular network, and your other controllers on other networks, so that they are not affected by the communications protocol overhead.
Feedback for Attempting to Copy or Cut to a Locked Clipboard
In the Sequence Editor, if the currently selected clipboard is locked, copying or cutting does nothing. This is so as to avoid accidentally overwriting the data on a clipboard that you want to keep. However, there is nothing stopping you from hitting "Ctrl-C" or "Ctrl-X", attempting to copy or cut, and in previous versions of Light-O-Rama, doing so would give you no indication that something was amiss until you later attempted to paste, and wound up pasting whatever had previously been on the clipboard, instead of what you thought you had just copied or cut. Now, the Sequence Editor will beep, to indicate that the attempted copy or cut did not take effect.
Vary Color of Channel Button Fonts
In the Sequence Editor, you can control whether or not the color of channel buttons changes during play (based upon the lighting effects happening on those channels). In early versions of Light-O-Rama, the text on the buttons was always black, and stayed black no matter what, which meant that sometimes the text was not readable.
In a relatively recent release, this was changed so that the color could be either black or white, depending upon which gives a more readable contrast with the background color of the button itself. However, some users found it to be distracting when a channel button's font would switch between black and white during play, and so you can now control whether or not this happens.
You can control it temporarily (until the next time the Sequence Editor is started) via the Vary Color of Channel Button Fonts item on the Play menu, or set your default preference (which will take effect every time the Sequence Editor is started) via Also vary their font colors on the Play Preferences dialog.
Unqualified File Name Used on Sequence Editor Tabs
When the Sequence Editor has multiple sequences open, it displays a tab strip across the top, with one tab per sequence. Each tab has the name of an open sequence; clicking on a tab causes that sequence to be displayed. In previous versions, the name of the sequence would include its directory name, if the sequence was not stored in the default directory for sequences. This could lead to some very wide tabs. Now, only the unqualified filename, without any directory information, is displayed.
The fully qualified filename can still be found via "Sequence Info", on the View menu.
Standalone Sequences No Longer Download Commands for Auxiliary Networks
If a sequence that used multiple Light-O-Rama networks was downloaded to a standalone controller (via the Hardware Utility's MP3 tab or via the Simple Show Builder), previous versions of Light-O-Rama would warn you of that fact, because standalone controllers only send commands out over a single comm line, and therefore the multiple networks would all get amalgamated into a single one when downloaded. Now, instead, only commands for controllers on the Regular Light-O-Rama network are downloaded.
| • | The Hardware Utility previously used Old MC-P compatibility mode when it should have not done so, and did not use it when it should have. |
| • | On some computers, the Clipboards panel would not show its full height, leading to most of its functionality being unavailable due to being offscreen. |
| • | Downloading large sequences for standalone controllers, such as via the Hardware Utility's MP3 tab, was much slower than it had been; its speed has now been increased. |
| • | Depending upon how Windows is set up, the LOR Control Panel would sometimes be unable to launch the various other LOR applications (such as the Show Player). |
| • | The Hardware Utility and Simple Show Builder would previously allow you to download any type of media file for a standalone sequence, such as WAV files or WMA files, despite the fact that only MP3 files are supported by the controllers. They will now give an error message if you attempt to download a media file other than an MP3 file. |
Sequence Editor Can Keep Lights On at End Of Play, and Turn Them Off Manually
In previous versions of Light-O-Rama, the Sequence Editor would automatically turn off all lights in a sequence when that sequence finished playing. It can now optionally keep them turned on, via the new "Lights Off at End" menu item in the Play menu. The lights can subsequently be turned off manually via "Lights Off Now".
| • | If, while importing a channel configuration file, you double-clicked the channel configuration's filename in the file browsing dialog, and if your mouse was over a sequence grid at the time, then after the file was imported, depending upon where your mouse was, this could have caused the grid to behave as if you clicked your mouse on it. For example, if you were over a channel button, the Channel Settings dialog for that channel could have opened. |
| • | If DMX effects were used in a sequence, and the Sequence Editor's Vary Color of Channel Buttons setting was turned on, then during play, for certain DMX effects, the sequence grid could temporarily go blank as displayed in the Sequence Editor (though the behaviour of your actual lights would not be adversely affected). |
| • | In certain situations, such as after an undo, the selected channel from the channel dropdown list in the Animator would spontaneously change to being the first channel in the list. |
| • | If you manually edited certain registry settings related to disk file paths (note: doing this is not recommended) which Light-O-Rama normally sets itself, leaving off a backslash at their ends would lead to unexpected results. |
| • | If an RGB channel (as opposed to one of its constituent channels) was used to draw in the Animator, and that RGB channel was deleted from the sequence, the cells of the Animator using that RGB channel would not be blanked out. |
| • | If a constituent channel of an RGB channel (as opposed to the RGB channel itself) was used to draw in the Animator, then in certain situations, the cells of the Animator using that constituent channel could have been blanked out inadvertently. |
| • | In certain situations, very small fades (for example 0% to 1%) over relatively long spans of time would cause other effects to spontaneously appear on the channel. |
| • | The Color Fade tool would give an option to insert DMX effects even if DMX editing was disabled. |
| • | If the Color Fade tool was used to make DMX effects, and those DMX effects were themselves fades, they would not be sent to the controllers. They now are sent, but (as of the time of this writing) LOR hardware does not support fading DMX effects, and so they are converted to regular fades. |
The Advanced OpenGL Settings Dialog
The new Advanced OpenGL Settings dialog can be used, experimentally, to try to investigate or work around strange graphics issues. However, this is not recommended; such problems can typically be better resolved in other ways, such as updating your computer's graphics card's drivers.
| • | The Set Paste Mode submenu in the Sequence Editor's Edit menu did not have a shortcut key associated with its Paste from Foreground option. |
| • | On some computers, selecting a sequence from the Sequence Editor's Windows menu would cause a portion of the display to remain showing the previous sequence, until something like a refresh was done. |
| • | When the Chase tool was used with Paste from Foreground turned off, and the chase was done either from the bottom left to the top right or vice versa, in some cases it would not properly overwrite existing effects outside of the actual things being chased with off effects. |
| • | The "+" key is supposed to invoke the Repeat tool, but only the "+" key on the standard part of the keyboard was doing so, while the "+" key on the numeric keypad did nothing. |
| • | When more than one sequence was open in the Sequence Editor, and they were maximized, clicking on the "X" to the right of the menu bar would close the active sequence (as it should), but that sequence's tab would remain open in the row of sequence tabs. Subsequently clicking on that tab, for the closed sequence, would cause the Sequence Editor to crash. |
| • | Stopping play of a sequence in the Sequence Editor would sometimes cause the column of cells that happened to be at the time of the start of play to become selected. |
| • | Various things in the Animator, such as drawing and erasing, were much slower than normal. |
| • | When a sequence was loaded, the Animator would not remember whether its controls were hidden for that sequence or not. |
| • | Attempting to write a musical sequence to an SD card (for a standalone controller) would result in a "subscript out of range" error message. |
An RGB channel represents a light or string of lights that can change colors - for example, a pixel on a Cosmic Color Ribbon. It consists of three "normal" channels, representing the three component colors - red, green and blue. Previously, to sequence such a device, you would have to sequence those three channels for the three component colors individually - that is, you would set up the sequence to have those three channels, and you would (for example) set the red channel to fade up, the green channel to hold steady, and the blue channel to fade down.
Now, you still can sequence the three component channels individually, but instead you could simply add an "RGB channel" to the sequence, and use it to deal more directly with the resulting colors. For example, instead of telling the red channel to fade up, the green channel to hold steady, and the blue channel to fade down, you would simply tell the RGB channel to fade from cyan to yellow.
The Color Fade tool is a new tool that can be used to tell RGB channels how to behave. For example, to specify that the RGB channel should fade from cyan to yellow over a certain time range in a sequence, you would select the Color Fade tool, with its colors set to cyan and yellow, and apply the tool to that time range of the sequence.
The Color Fade tool can also be used to do fills, by clicking the selected area instead of clicking and dragging.
The Repeat tool takes whatever is contained in the selected area of the sequence and makes a new copy of it immediately following the selected area. Using the tool again (without changing what area of the sequence has been selected) will make another new copy immediately following the first, and using it again will make a third new copy immediately following the second. This can be repeated as many times as you like, making as many back-to-back copies of the selected area as you want.
The Intelligent Fade tool is similar to the Fade Up and Fade Down tools. However, using it makes either a fade up or a fade down, depending upon whether you click and drag left to right or right to left.
It can also be used to do fills, by clicking the selected area instead of clicking and dragging.
If you apply the Fill tool to an area that has no effects (i.e. the lights are off in that channel at that time), it will automatically make a fade from the intensity that precedes the empty area to the intensity that follows the empty area. For example, if there is a fade up from 0 to 75, followed by the lights being off, followed by a fade down from 50 to 25, and you apply the Fill tool to the area where the lights are off, it will change that area so that it becomes a fade down from 75 to 50.
The Fill tool can also be used in a similar way on RGB channels, where it will change an empty area so that it fades from the color preceding the empty area to the color following the empty area.
The Fill tool behaves a little differently than most other tools. With most tools, if you click and drag an area, that area will be selected, and when you let up on the mouse button, that tool will be applied to the selected area. The Fill tool, however, does not select an area, and it is applied as soon as you click, and as soon as you drag to a new area, too. This, combined with the fact that the Fill tool does nothing if it's used on an area that already has an effect, hopefully makes it quick and easy to fill a large and complicated area of the sequence just by clicking once and dragging around to the appropriate spots without letting go of the mouse button.
The Chase tool takes a pattern and "chases" it through the selected area. That is, when you click on a spot in the sequence, and then drag through other channels and through time, then when you let go of the mouse button, it will take the pattern in the selected area's corner where you initially clicked and copy it through the remaining channels in the selection, offsetting it a little bit in time with each subsequent channel.
"Paste from Foreground" is a new pasting option. When it is turned on, any portions of the clipboard's copy buffer that have "off" effects won't actually be pasted when you select "Paste". That is, copied "off" effects won't overwrite what you already have in your sequence.
The channel button popup menu now gives a new way to add channels to a sequence: "Add Device". When this is selected, a dialog will open asking the type of device to add (such as an LOR/CTB 16 or a Cosmic Color Ribbon) and some settings for that device (such as its unit ID). The appropriate number of channels will then be added to the sequence, and they will automatically be populated with the appropriate unit IDs, circuit IDs, and so forth.
The left-hand side of the Sequence Editor now has a new Tools Panel, with a few subpanels ("Saved Tools", "Recent Tools" and "Clipboards"). The panel can be pinned to the display so that it is always open, or it can be hidden so that it appears only as a small tab on the left of the Sequence Editor, with the full panel sliding out when the mouse goes over that tab. The individual subpanels can also be collapsed or expanded.
The Recent Tools subpanel of the Tools Panel on the left-hand side of the Sequence Editor shows buttons representing the tools that were used recently (such as "Fade Up 25-75", "Shimmer Down 100-0", or a color fade). Clicking on one of the buttons will make that tool the currently active tool.
Not all tools are put on the Recent Tools subpanel's list; only those that would take more than one mouse click to activate are put there. For example, "Toggle" and "Shimmer" do not get put on the list, since you could activate those in a single mouseclick (from the Tools toolbar).
Right-clicking on a tool's button enables you to put the tool on the Saved Tools list.
The Saved Tools subpanel of the Tools Panel on the left-hand side of the Sequence Editor is similar to the Recent Toolssubpanel, except that it shows only those tools that you have decided to save. Once you put a tool on the Saved Tools list, it will remain there (until you explicitly remove it), even after the Sequence Editor has been stopped and restarted.
In previous versions of the Sequence Editor, there was only a single clipboard for copying and pasting. Now, the Sequence Editor starts with a single clipboard, but you can easily add more of them, and quickly switch between which one is in use at the moment, using the new Clipboards subpanel of the Tools Panel on the left-hand side of the Sequence Editor. That is, you now can have several different things copied at the same time, all of which can be pasted into your sequence.
The Clipboards subpanel also allows you to save a clipboard, so that its contents will be available to be pasted even after you stop and restart the Sequence Editor, and to lock a clipboard, so that it cannot be copied to (but still can be pasted from), to prevent accidental overwriting of a clipboard that you want to keep.
It also allows quick access to pasting options such as Paste by Cell, Paste by Time, and Paste from Foreground.
Sequences Created with Equally Spaced Timings in Freeform Grids
Previously, if you chose to create a sequence with equally spaced timings (such as "a timing every tenth of a second"), the sequence's first timing grid would be a fixed timing grid. You can now optionally make it either a fixed timing grid or a freeform timing grid.
Select Multiple Files in the Hardware Utility's MP3 Tab
You can now select multiple files simultaneously in the Hardware Utility's MP3 tab (by using standard Windows methods, such as Shift-click).
When more than one sequence is open, the Sequence Editor now shows a single one of them, maximized, with tabs across the top having the names of the open sequences. Selecting any particular tab will cause the Sequence Editor to switch to display that sequence.
If you want to see multiple sequences at once, you can unmaximize the currently displayed sequence.
Several hotkeys for various menu items on the Tools menu have been changed, to try to minimize overlap and to give unique hotkeys to as many "high profile" tools as possible.
The keys assigned to several keyboard editing shortcuts have been changed, to make room for new functions (such as the Chase tool and Fill tool).
One changed keyboard editing shortcut which it is worth explicitly pointing out (because it has been requested by several people) is that the Delete key will now apply the "Off" tool to the selected area.
Keyboard's Background/Foreground Selectors' Behavior Changed
Previously, background and foreground effects mode could be enabled by certain keystrokes. To turn them off, there was a different keystroke for enabling "regular" effects. Now, instead of keystrokes to enable those modes, there are keystrokes to toggle them between being enabled and disabled.
Shimmer and Twinkle Display Update
In the sequence grid, shimmer and twinkle effects are now displayed as a little heavier than they used to be, to hopefully make them more easily recognized.
Note that this change is only from the point of view of how they look displayed on your screen in the Sequence Editor; their behavior on your actual lights is unchanged from what it was before.
Text of Channel Buttons Changes Color During Play
During play, the Sequence Editor can be set up to change the colors of channel buttons to represent the current intensity of the associated channel. The text of the channel name on that channel button, however, was always black. Depending upon the color of the channel and its current intensity, this could sometimes make the button difficult or even impossible to read. Now, the color of the text of a button will be either black or white, depending upon which would be easier to read at that moment for that channel.
Previously, if a user had a computer that was not connected to the internet, they could only register that computer by calling in to Light-O-Rama Customer Support. LOR Customer Support had a program called the "Offline Registration Utility" which they then used to get the user's computer activated.
This program is now distributed by the LOR installer, along with all the other programs (such as the Sequence Editor). So, if a customer has two machines, one of which is connected to the internet but the other of which is not, they can register their offline computer by using the Offline Registration Utility on the online computer, without calling in to LOR Customer Support.
Offline registration via LOR Customer Support is still available, in case (for example) the customer has only one computer, and it is not connected to the internet.
| • | In the Sequence Editor, when "Paste by Cell" was set, and a copy and paste was done including an event that was not completely coincident with a cell, in some situations the events pasted wouldn't appropriately match the events copied completely. |
| • | In the Sequence Editor, dragging a channel button in order to move that channel would not work properly if the visible channel range was scrolled up or down while dragging. |
| • | Various issues were fixed when converting a sequence from being a musical sequence to an animation sequence, and vice versa. |
| • | When the DMX Tool, Fade Tool or Intensity Tool windows were closed by clicking on their "X" buttons, the next time that they were displayed, they would be displayed in an entirely new location instead of in the spot where they had been when they were closed. |
| • | The "Paste" button on the Sequence Editor's toolbar would not be enabled until after a copy (as opposed to a cut) had been done. That is, if you started up the Sequence Editor and immediately did a cut, the Paste button would still be greyed out even though you had cut something. |
| • | If you double-clicked somewhere on the New and Open dialog, for example to open a sequence by double-clicking its filename, then depending upon where your mouse was, when the dialog closed and the sequence opened, it could have caused something to happen such as a channel's settings dialog being opened, or the current tool being applied to a cell in the sequence. |
This version fixes the following bugs:
| • | The Schedule Editor only displayed a thin portion of its vertical scroll bar. |
| • | In certain situations, the Sequence Editor could possibly crash after having undone the adding of timings. |
You can now cause a show to be played without having scheduled it. This is done via the "Show On Demand" menu item of the Light-O-Rama Control Panel's popup menu.
Please note that this feature is available only for license levels Basic Plus and higher.
Show Player Can Preload Sequences
In previous versions of Light-O-Rama, when the Show Player played a show, a sequence in that show would not be loaded until the first time it was used in the show. Depending upon the size of the sequence and the power of the computer, it could take a human-noticeable amount of time to load a sequence, so this could lead to undesired delays between sequences (the first time they are played during a given run of a show).
This is still the default behavior, but you can now optionally set the show to preload sequences, so that they will all be loaded as the first step in the show, before any of them are played.
Shows Can Be Shut Down Gracefully
In previous versions of Light-O-Rama, selecting "Disable Shows" from the Light-O-Rama Control Panel's menu would cause the currently running show to stop immediately, abruptly stopping any sequences that happened to be playing. This can still be done (by selecting "Disable Shows Immediately"), but you can now shut down a show gracefully instead (by selecting "Disable Shows Gracefully").
This will cause the show that happens to be playing (if any) to be put into shutdown mode; any song that happens to be playing will be allowed to finish, after which the show's Shutdown section will run. When the Shutdown section finishes, the show will stop, and shows will be disabled.
LOR Control Panel Improvements
Several improvements were made to the Light-O-Rama Control Panel:
| • | The "Current" and "Scheduled" sections of its status window were often mostly redundant (if the currently playing show was the show that was scheduled to be playing at the current time). The "Scheduled" section has now been replaced by a "Next" section, which shows what will happen after the current show. |
| • | Those sections would update only after a noticeable delay of several seconds. They now update in a much more real-time fashion. |
| • | Similarly, the first log messages that were displayed would be delayed; they are now real-time. |
| • | The Control Panel's light bulb icon in the system tray now is different colors depending upon the state of the system: If scheduled shows are enabled, it is blue; if they are disabled, but shows on demand are enabled, it is orange; if shows are disabled entirely, it is red. |
| • | Several new log messages were added, hopefully giving a more informative view into what the Show Player is doing. |
In previous versions of Light-O-Rama, when the Musical Section of a show was set to shuffle the sequences instead of playing them in order, any sequence could be randomly chosen to play at any time. This meant that, for example, the same sequence could play twice (or more) in a row, or some particular sequence could be played a second time before some other particular sequence was played even once.
The Show Editor now allows you to control the way that sequences are shuffled: You can choose whether or not a single sequence is allowed to be played twice in a row, and you can choose whether or not all sequences must be played once before some sequence is played a second time.
Existing show files will continue to behave in the same manner as they did before (unless and until you change their settings): a sequence can be repeated back-to-back, and can be played a second time before all other sequences have been played once.
The default for new shows is exactly the opposite: no sequence will be played twice in a row, and no sequence will be played a second time before all sequences have been played once.
Maximum Light-O-Rama Circuit Number Is Now 512
In previous versions of Light-O-Rama, the maximum allowable circuit number for a Light-O-Rama controller was 256. It is now 512. At the present time, this is primarily useful for controlling DMX devices.
New iDMX1000 Firmware: Version 1.41
A new version of the firmware for the iDMX1000 has been released (version 1.41). It contains the following enhancements:
| • | It now has native address support (i.e. there is no longer a need for multiple unit IDs for a single iDMX1000). The old method of having a single iDMX1000 use multiple unit IDs is still supported, as "legacy mode". An iDMX1000 will be in native mode or legacy mode depending upon the unit ID it is set to: If its unit ID ends in a "0" (such as "10", "20", or "30"), it will be in legacy mode, where it actually uses sixteen unit IDs of sixteen channels each (e.g. setting the unit ID to 10 will cause it to use unit IDs 10 through 19 and 1A through 1F). If its unit ID ends in anything other than a zero, it will use only that single unit ID, but it will support all its channels on that single unit ID. |
| • | Previously, only DMX addresses up to 256 were supported. Now, addresses up to 512 are supported (but only in native mode). |
| • | Previously, only 64 "intelligent channels" were supported at a time - i.e. only 64 channels could simultaneously be doing shimmers, twinkles, and/or fades. Now, 128 intelligent channels are supported at a time. |
New DIO32 Firmware: Version 1.30
A new version of the firmware for the DIO32 motherboard has been released (version 1.30). This version adds native address support - that is, there is no longer a need to use multiple unit IDs for a single DIO32; it can now support all channels on a single unit ID.
Please note that in order to take advantage of this new functionality, you will not only have to use the new firmware, but you will also have to change a jumper on the board which tells it whether to operate in native mode or legacy mode. Please refer to your DIO32 documentation for details.
New DC-MP3 Firmware: Version 4.10
A new version of the firmware for the DC-MP3 has been released (version 4.10). It contains the following enhancements and fixes:
| • | Previously, an individual sequence could only last for up to ten minutes. It can now last up to 44 hours. |
| • | Previously, only certain manufacturer's SD cards were supported. A much larger variety is now supported (list to be compiled - although it will more likely be a list of unsupported cards rather than a list of supported cards). |
| • | Support for SD cards with the FAT32 file system was added. |
| • | Support for SDHC (high capacity) SD cards was added. |
| • | Previously, shows could be set to play every hour or every half hour; they now can also be set to play every 15 minutes or every 10 minutes. |
| • | Digital output (DO) pins 1 through 6 now operate. They react to commands for unit ID F0, channels 1 through 6. They only react on the DC-MP3 that is controlling the show; for example, they will not react on a DC-MP3 controlled via the PC network. |
| • | Under some circumstances, shows would start at midnight, without having been scheduled to do so. This has been fixed. |
| • | Protection against several possible crashes was added to the Light-O-Rama Control Panel. Although it is not known if any of these actually caused any crashes, it is known that some customers have had the Light-O-Rama Control Panel crash. |
| • | When disabling shows, or when unloading Light-O-Rama, the LOR Control Panel would hang frozen for a noticeable amount of time before becoming responsive again (in the case of disabling shows) or closing (in the case of unloading). |
| • | The Light-O-Rama Control Panel's status window would sometimes incorrectly state that the next show would start at 12:00 AM on Sunday. |
| • | Sometimes, lighting commands were quickly repeated back-to-back. This would not cause any noticeable problems with how the sequence looked, but it did cause a minor increase in network traffic, or standalone/SD sequence file size. |
Light-O-Rama Diagnostic Distributed by Installer
The Light-O-Rama Diagnostic is a troubleshooting tool that displays various information about your Light-O-Rama configuration. It used to be available only as a separate download from lightorama.com, but now is installed as a standard part of the Light-O-Rama Software Package.
| • | On Windows 98 SE machines, running a show of sufficient length would eventually cause an error message to pop up, saying that an error occurred in "Formhook_aftermessage". Clicking "OK" would close the error message, but it would soon pop up again, and again and again. If it was left without clicking "OK" to close it, eventually the show would stop abnormally. |
| • | In the Sequence Editor, "Sequence Info", from the "View" menu, would sometimes display the incorrect directory of the media file associated with a musical sequence. |
| • | If a channel was set up to be a subsequence, and the sequence file assigned to it did not exist or otherwise could not be loaded, then loading of the main sequence would fail when the loading of the subsequence failed. The result of this was that the main sequence could not be opened, and so the problem could not be fixed by modifying the subsequence filename associated with the channel. Now, the main sequence will successfully load, and the missing subsequence will simply not do anything during play. Note that the Light-O-Rama Verifier will still show this error. |
| • | If you set the name of a channel to include an ampersand, then in the Sequence Editor, the name would be displayed on the channel's button improperly. The ampersand would be missing, and the character after it would be underlined (indicating that it could be used as a hotkey for that button). |
| • | If the Sequence Editor was used on a computer with multiple monitors, and the cursor was hovered over a spot on a sequence grid that was on a monitor to the right of the primary monitor, the tool tip would pop up in the wrong place (on the far right side of the primary monitor). |
| • | Hitting the escape key closes most dialogs, but it did not close the Beat Wizard, VU Wizard, or Tapper Wizard. |
Undo/Redo Recording Can Be Disabled
Certain very large operations in the Sequence Editor could take a very long time to do. For example, skewing a track involves changing all of the timings, effects, and loops in the track; in a large sequence with many channels, this could take a prohibitively long time. Much of the time spent is actually due to recording the changes so as to later be able to undo and redo them.
For situations like this, undo and redo recording can now be disabled, via the Edit menu. You will not be able to undo any changes that were made while undo recording was disabled, but the changes that you make will be made more quickly.
All License Levels Now Use Unencrypted Save Files
In previous versions of Light-O-Rama, when a sequence was saved using either a Basic license or else the unlicensed Demo version of the software, the sequence file would be encrypted instead of being saved in plain XML. Now, this encryption is done only for the unlicensed Demo version; a Basic level license (or any other level license) will cause files to be saved unencrypted.
Hardware Utility Shows Version of Connected MP3 Director's Firmware
Previously, the Hardware Utility's LOR MP3 tab would show whether an MP3 Director was connected or not. Now, if one is, it additionally shows the MP3 Director's firmware version.
New DC-MP3 Firmware: Version 3.3
Version 3.2 of the DC-MP3 firmware (DC_MP3_V3-3.lhx) adds one new feature and fixes two bugs:
| • | Output number 8, which was previously unused, will now be high (+5 volts) when a show is active, and zero when no show is active. |
| • | When a sequence started playing, in some rare cases the music and the lights would start off significantly out of sync with each other. |
| • | A bug was causing trigger number 6 to interact with trigger number 3 in some cases. |
New Servo Dog Firmware: Version 1.02
Version 1.02 of the Servo Dog firmware (ServoDog_V1-02.lhx) fixes a bug where if channels 1 and 8 were in digital output mode, there would be crosstalk causing random results.
| • | Skewing a track would not work if the timing grid currently in use by the track was a fixed timing grid. |
| • | In the Servo Dog Utility, when a channel button was clicked, if another channel button had previously been selected, there was a chance that the configuration of the channel that was clicked would be set to the same values as the configuration of the channel that had previously been selected. |
| • | In the Hardware Utility, controllers that were connected via Easy Light Linkers were not showing up in all cases. |
| • | If a show was scheduled starting on Saturday and ending on Sunday, instead of playing through, it would continuously shut down and restart. A common symptom of this is that the first sequence in the show's musical section would play over and over. |
| • | X10 controllers were not successfully being controlled in some situations. |
| • | When a sequence was loaded, the zoom level of its waveform display was being set to a default value, rather than to the zoom level the sequence had been saved with. |
The following changes were made in this version:
LOR Control Panel's Status Window Now Displays a Log
The Light-O-Rama Control Panel's status window now displays a log of what is occurring with shows. For example, it displays messages indicating that a show or a sequence is stopping or starting, that an error occurred playing a sequence, and that an interactive trigger was detected.
Support for Configuring Cosmic Color Ribbons
The Hardware Utility's Configuration screen now supports configuring Cosmic Color Ribbons.
Circuit IDs Greater than 16 Supported
In previous versions, the circuit IDs of Light-O-Rama controllers could range from 1 to 16. They now can range from 1 to 256 instead.
Note that not all Light-O-Rama controllers have more than sixteen circuits, and of those that do, not all support this new feature yet (instead, they use more than one unit ID, each with sixteen possible circuit IDs). Currently, the only Light-O-Rama controller that can be set to use more than sixteen circuit IDs for a single unit ID is the Cosmic Color Ribbon. Support for this feature in some other controllers is planned for the future, at which time firmware upgrades may be necessary to take advantage of it.
The Light-O-Rama ServoDog Utility
The Light-O-Rama ServoDog Utility is a new program which can be used to configure Light-O-Rama ServoDog controllers.
| • | If an error opening a comm port occurred when the Hardware Utility was being started, this could lead to strange errors later, such as the Hardware Utility unexpectedly closing in certain situations. |
| • | If the musical section of a show contained sequences that could not be played due to errors, then in some situations the first sequence of the musical section of the show might repeat several times in a row. |
| • | On some computers, when a Light-O-Rama program (such as the Sequence Editor) was started, it would open in Demo mode very frequently, despite having previously been activated (and without having upgraded to a new version). |
| • | In the Sequence Editor, if you clicked the space bar to start play while the mouse button was down, then when play ended, you would be in "mouse dragging" mode, no matter whether you subsequently released the mouse button or not. |
| • | If you used a countdown in the Tapper Wizard, sometimes the song would not start after the conclusion of the countdown. |
| • | Various problems would occur if you set the default Sequences and Audio directories to be top level directories of a drive (for example, "C:\Sequences" and "C:\Audio" rather than "C:\LOR\Sequences" and "C:\LOR\Audio"). |
| • | In some situations, deleting a track from a sequence would cause the track dropdown list and the timing grid dropdown list to misbehave. |
The following changes were made in this version:
Exporting/Importing Channel Configuration with Tracks Improved
In previous versions of Light-O-Rama, exporting and importing channel configuration from and to sequences that have more than one track could lead to strange, and probably undesired, results. This was due to the interaction between channels that were in more than one track of the sequence and channels that were in more than one track of the configuration file. If the positions of such channels did not match up between the sequence and the configuration file, then the resulting settings of those channels would be changed in a predictable, but probably undesired, way.
In this version, the method of importing has been altered, so as to give (hopefully) better results:
Unlike in previous versions, the first step to importing channel configuration, before any channels are actually imported from the configuration file, is now to check the sequence for channels that are in more than one track. If any such channels are found, then all copies of each channel, except for the first of each channel, are removed from the sequence.
Next, channels are imported from the configuration file. But unlike in previous versions, if a channel is in more than one track of the configuration file, instead of overwriting the settings of an existing channel in the sequence every time the channel is encountered in the configuration file, that is only done on the first encounter of the channel. Instead, on subsequent encounters of the same channel, a copy of the appropriate channel from the sequence is inserted into the track at the appropriate position.
This has two potential side effects to watch out for (although both of these seem minor compared to the side effects caused in previous versions):
First, if a track in the sequence is composed entirely of channels from previous tracks, and the channel configuration file has no track in the same position, then all channels will be removed from that track. Since the track has no channels, it will then be removed from the sequence. However, note that these channels have not been removed from the sequence - they have only been removed from the track. They are still in the earlier tracks.
Second, a channel from the sequence with no corresponding channel in the configuration file could get "pushed down" towards the bottom of the sequence's track, if the channel configuration file contains channels in that track which are copies of channels from earlier tracks.
Commands Sent to Holiday Lights Designer Regardless of Licensing Level
Different licensing levels can control different numbers of controllers; for example, the Basic level can control two controllers, while the Advanced level can control an unlimited number of controllers. If a sequence contains a lighting effect for a controller that the license level cannot control, the effect is simply not sent to the controller.
In previous versions, this also applied to sending commands to Holiday Lights Designer: lighting effects could be sent to Holiday Lights Designer only if they could be sent to an actual controller, based on the license level. Now, lighting effects can always be sent to Holiday Lights Designer, regardless of the licensing level.
Hardware Utility Supports DIO32 Servo Configuration
The Hardware Utility can now be used to configure the DIO32 for servos.
The Hardware Utility's Refresh command, used to scan a Light-O-Rama network for controllers, now works more quickly than it did before.
| • | If a show contains some sequences in a "Magic Toy" interactive group, and a trigger in that group is triggered, any playing sequences that happen to be from that same interactive group should be, but were not, stopped, before the newly triggered sequences start. |
| • | The Channel Property Grid would allow you to remove the last channel from a track, which would lead to undesired behavior. It now no longer allows the last channel to be removed from a track. |
| • | There must be a channel in every track; Light-O-Rama should prevent you from removing the last channel from a track. Due to bugs, though, it's possible that the last channel could be removed from a track; in such a case, if the sequence were saved, it could not thereafter be reloaded. In this version, the sequence can now be loaded, but any tracks without channels will automatically be removed from the sequence during the load. |
| • | Input triggers would work correctly only for the first eight circuits of a controller. They now work on the full sixteen. |
The following changes were made in this version:
The Tapper Wizard was improved in several ways:
| • | It now knows about timing grids. You can select an existing grid to use, or create new grids to use, from within the Tapper Wizard itself. |
| • | Inserting timings and inserting lighting effects can now be done independently of each other - you can do either or both. |
| • | You can play a particular part of a song, rather than the whole song. When the Tapper Wizard is first opened, its play range will automatically be set to the active track's freeform play range, if there is one, or to its normal play range (such as play full sequence or play visible screen) if not. |
| • | You can set the play speed, either to normal speed, half speed, or double speed. |
| • | It can be used repeatedly without closing, with or without tapping again. For example, after applying your taps to the sequence, you could collect a whole new set of taps, or you could apply your existing taps to the sequence again, in a new way (such as applying them to a different channel, or with different flash and fade times), all without ever closing the Tapper Wizard. |
| • | It supports undo and redo within itself; you do not have to close the Tapper Wizard to undo or redo its changes. |
| • | It no longer relies on helper forms to collect information (such as the length of time that a flash should take); this information is now set via fields on the Tapper Wizard itself. |
| • | The settings that you choose, such as whether to use a countdown, how long that countdown should be, whether to use the mouse, the keyboard, or both, what kind of effects or timings should be inserted, and so forth, are remembered, so that you do not have to change them every time that you enter the Tapper Wizard. |
Animator's Twinkle Effect Made More Realistic
Recent efficiency improvements to the Animator increased the speed it could redraw at. This had the side effect of making its twinkle effects twinkle too quickly, almost looking like shimmers. The Animator's twinkle effect has now been slowed back down, to more closely resemble the twinkle effect on actual lights.
Please note that this change does not affect the way that twinkle behaves on your lights at all; they will behave exactly as they always have. It only affects how twinkle is represented in the Animator (which is an approximation, not an exact representation, of how it looks on actual lights).
Fade Tool Settings and Intensity Tool Settings Can Be Toggled On and Off
In previous versions, clicking of the Fade Tool Settings toolbar button would open the Fade Tool Settings dialog, as would clicking on the Tools menu's Fade Tool Settings item. The only way to close the dialog was to click on its Windows close button, or to use the escape key. Now, the toolbar button (or the menu item) can be used as a toggle - clicking it once shows the dialog; clicking it again hides it.
A similar change was made for the Intensity Tool Settings dialog.
New Keyboard Shortcuts for Selecting the Current Tool
When editing sequences via the keyboard, previous versions would allow you to hit the Enter key to apply the current tool to the selected area of the sequence. Alternatively, to apply a different tool, you could hit some other key, specific to that tool; this would leave the current tool the same as it was. For example, if the current tool was the shimmer tool, you could hit Enter to apply a shimmer, or "T" to apply a twinkle.
However, the current tool itself could not be selected except via the toolbar, or menu items on the Tools menu. It can now be selected via the keyboard as well, by using Shift in addition to the desired effect's normal key. For example, Shift-T will change the current tool to change the current tool to be the twinkle tool. Note that this leaves the sequence itself untouched (but you can still hit Enter to apply the current tool to the sequence, or one of the specific keys to apply some other tool).
Due to this change, certain existing keyboard shortcuts had to be remapped. Specifically, Shift-S, Shift-T, Shift-I, Shift-U and Shift-D used to change the current custom tool to be a custom shimmer, twinkle, intensity, fade up, or fade down, respectively. These have been replaced with Ctrl-Shift-S, Ctrl-Shift-T, Ctrl-Shift-I, Ctrl-Shift-U, and Ctrl-Shift-D, respectively.
Keyboard Editing while Using the Animator Made Easier
When you click on a control in the Animator, after that control's operation has completed, the focus is now immediately given back to the sequence grid. The effect of this is that you can continue using the keyboard to edit the sequence without needing to mouse-click on it every time you change something in the Animator.
Previously, when the Sequence Editor saved a sequence, it would delete the backup file of that sequence, then rename the existing save file to the backup, then write a new version of the save file, then verify that it could load the new version of the save file. If it could not load the new version, it would give a warning message saying so, and giving the name of the backup file.
Instead, it now writes the sequence to a temporary file, then verifies that it can load that temporary file. Only if it can load the temporary file does it then proceed to delete the backup file, rename the existing save file to the backup, and finally rename the temporary file to the real save file name.
Track Bar of Active Track Highlighted
In the Sequence Editor, the track bar of the currently active track in a sequence is now colored green, so as to make it easily distinguishable from the other tracks.
| • | In the Sequence Editor, if the total time of a track was increased, and that track was currently using a fixed timing grid, an error message would pop up saying that timings cannot be added to fixed grids. |
| • | If the Windows option "Hide extensions for known file types" was turned on, the New and Open dialog's "Existing Sequence" tab would not properly display the type of each file. |
This version fixes the following bugs:
| • | In the Sequence Editor, when the mouse was moved to the left of the channel bar, an error message would sometimes pop up, saying "Invalid centisecond for finding timing", followed by a negative number. This would always happen when the mouse was dragging, and sometimes happen otherwise. |
| • | On some computers running Windows Vista, installation would fail, giving an error about Microsoft's MDAC component. |
This version fixes the following bug: Upon upgrade from a previous version of Light-O-Rama, if the user chose a different directory to store sequence and audio files than was chosen for the previous version, the post-install process would neglect to copy the files from the old directory to the new one.
The following changes were made for Light-O-Rama version 2.3.4:
A timing grid is a collection of timings. A sequence can have more than one timing grid, but only one (per track) is displayed at any given time. You can quickly change which timing grid is displayed at any time by selecting from the Tracks and Timings toolbar's timings dropdown list.
There are two types of timing grids: fixed timing grids, which have timings at equal distances from each other, and which cannot have timings added, removed, or moved, and freeform timing grids, which can have timings anywhere, and which can have timings added, removed, or moved.
Timing grids are intended to better fulfill a role that was fulfilled in previous versions of Light-O-Rama by tracks: Allowing different sets of timings to be used on the exact same channels.
For example, perhaps you have a song for which you would like some lighting effects sequenced to the sound of the bass drum, and other lighting effects sequenced to the sound of the lead guitar. You could simply add timings for both, but this could make it easy to forget which timing is for which instrument; it could also make the display seem too cluttered with timings.
To solve this problem in previous versions of Light-O-Rama, you could duplicate the track to a new track, so that you had two different tracks in the sequence, both with the same channels as each other. The two tracks could use different timings, one track representing the bass drum and the other representing the lead guitar.
You can still do that in this new version of Light-O-Rama, but you can now instead solve the problem by using timing grids. Instead of adding a second track, you could add a second timing grid. One timing grid would represent the bass drum, and the other would represent the lead guitar. You could quickly switch which timing grid is displayed using the Tracks and Timings toolbar's timings dropdown list, changing back and forth between drum and guitar as appropriate, all with only a single track.
The Tracks and Timings toolbar also has a timings button; clicking on it will open a popup menu with various timings grid-related options, such as adding a new timing grid or deleting an existing one.
When this new version of Light-O-Rama opens a sequence created with a previous version (in which there was no such thing as a timing grid), it will automatically create one freeform timing grid per track in the sequence.
The new Light-O-Rama Verifier program can be used to check for certain types of problems with your Light-O-Rama configuration, schedule, shows, and sequences. By using the Verifier, you may be able to fix these problems before they cause any issues when your show is played.
Beat Wizard and VU Wizard Improvements
In previous versions, the Beat Wizard and the VU Wizard would always add timings, regardless of whether they were also adding effects or not. They can now add timings and effects independently of each other.
Also, when inserting effects, they can now optionally snap them to the timings being used.
Initial Play of Sequences Sped Up
The amount of time that it takes for a sequence to start playing the first time after it is loaded (or after it is changed or the play range is changed) has been decreased.
Events Straddling the Start of a Play Range Are Played
In the Sequence Editor, if the play range is set to anything other than the full sequence, and an effect event starts before the play range starts but ends during (or after) the play range, previous versions of Light-O-Rama would not control the lights based upon that event. Instead, now, the portion of the event within the play range is sent to the lights (for example, if the event is a fade up from 0% to 100% from 36 seconds to 38 seconds, and the play range starts at 37 seconds, the lights will be sent a command to fade up from 50% to 100%).
New and Open Dialog Improvements
Several improvements were made to the Sequence Editor's New and Open dialog:
In previous versions, the dialog was a fixed size, which could not be changed. It can now be resized or maximized, and will remember its sizing and positioning even after the Sequence Editor is closed and restarted.
The dialog's Existing Sequence tab used to always show a list of folders and sequences in a single way. It now has an option to change the view, similarly to Windows Explorer. For example, if the "Details" view is selected, then in addition to file names, details such as file sizes and modification dates will be displayed. Clicking on a column header in the "Details" view will sort the files by that column; clicking on it again will sort in reverse order. The dialog will remember the selected view and sorting behavior even after the Sequence Editor is closed and restarted.
The Existing Sequence tab now also has a "Search" box. If you type something into this box, only files with that somewhere in their name will be listed. Wildcard characters (*, ? and #) are supported in the search box.
The Standard Toolbar's "Open" button would previously always open the dialog to the "Existing Sequence" tab. It now instead opens it to whichever of "Existing Sequence" or "Recent Sequence" was most recently used.
New Musical Sequence's Initial Channels Can Be Based on a Channel Configuration File
When you create a new musical sequence, the New Musical Sequence dialog now lets you base the initial channels for the sequence off of the contents of a channel configuration file, rather than simply specifying a number of channels.
New Musical Sequence's Artist, Album, and Song Names Pulled from MP3
If you create a musical sequence based on an MP3 file, the New Musical Sequence dialog automatically uses the artist, album and song names from the MP3 itself (if the MP3 is tagged with this information). You can still change these in the dialog if you wish.
Support for Normally Closed Input Triggers
Previous versions of Light-O-Rama only supported normally open circuits for use as input triggers. Normally closed circuits are now supported as well, via the Hardware Utility's LOR controller configuration screen.
You may need to update the firmware of your controller in order to take advantage of this new feature.
Interactive Triggers Can Be Tested in the Hardware Utility
The Hardware Utility's LOR controller testing screen can now be used to test input triggers from LOR controllers.
Maximum and Minimum Intensities Read from Controller
The Hardware Utility's LOR controller configuration screen can now read the maximum and minimum intensity settings of a Light-O-Rama controller from the controller itself.
You may need to update the firmware of your controller in order to take advantage of this new feature.
Extra Information in Sequence Grid Tooltips
The tooltip displayed in the Sequence Editor when the mouse hovers over a cell in a sequence now includes more information than before, including details on the effect event being hovered over.
You can configure various settings about the tooltips, such as how long they take to open and how they close, via the Display Preferences dialog.
Control Panel's Status Window Can Be Minimized
The status window of the Light-O-Rama Control Panel can now be minimized to the Windows task bar.
Fades Are Smoother in the Animator
The Animator used to display fades in a somewhat jerky manner, only updating the display after the color of a cell has changed by a fairly significant amount. Depending upon the speed of the fade, this would lead to fades more as steps through several intensities rather than as actual fades (note that this only affected the appearance of the Animator, not the appearance of any real lights that you had hooked up via controllers). Fades should now appear more smoothly in the Animator.
Animator CPU Utilization Improved
Various changes were made to the Animator to decrease the amount of CPU time that it takes to display the animation.
Animator Redraw Throttling Configurable
During play, the Animator only redraws the animation every so often, rather than every time that something changes. This is to try to ensure that it does not use too much CPU time. In the past, the amount of time between redraws was a certain constant value; now, you can modify it in the Display Preferences dialog, to try to strike an appropriate balance between CPU usage and smoothness of display for your individual computer.
Zooming with the Animator's Autosize Mode
When the Animator's controls are hidden, expanding and contracting the Animator's window is supposed to also automatically resize the drawing area within the window. However, due to certain sizing requirements, the drawing area can only be certain possible sizes for any given animation. So, when the window was manually resized by clicking and dragging a side or a corner, the drawing area would remain the same size, until the window got large enough to hold the next possible size, at which time the drawing area would "jump" to the new size.
To make this autosizing quicker and easier, the ability to manually resize by dragging a side or a corner of the window has been replaced by "zoom" buttons on the toolbar, which will immediately resize the window (and the drawing area) to the next possible size.
This release fixes the following issues:
| • | If the same show had been scheduled twice back-to-back, it would have simply continued playing rather than stopping and restarting. |
| • | If a channel was set up to represent a subsequence, changing the subsequence file associated with the channel would not cause the channel's main sequence to be marked as having unsaved changes. |
| • | If a musical sequence based on a MIDI file was playing in the Sequence Editor, and was paused or stopped before its natural end, and the sequence had used the MIDI Wizard, then the Sequence Editor would not send out MIDI commands saying to stop sounds. This caused whatever notes happened to be playing when the sequence was paused or stopped to continue playing indefinitely. |
| • | If the VU Wizard were used to toggle cells on and off during part of a song, as opposed to the entire song, it would sometimes get the toggling backwards, turning on cells that should have been turned off, and vice versa. |
| • | If the VU Wizard were used to toggle cells on and off during part of a song, as opposed to the entire song, it would not necessarily get the state of the first or the last cell in the range correct. |
| • | If the VU Wizard were set up such that the entire selected area of the song was below the specified peak threshold, an error box would appear, saying "Subscript out of range". |
| • | If an animation had a background image, and the Animator's controls were hidden, resizing the window would not necessarily keep the image's proportions as they were. |
| • | If the Animator's controls were hidden, resizing the window would only automatically resize the animation if it had a background image. |
| • | The menu items on the Wave Form submenu of the Sequence Editor's View menu would not become checked until one of them (or the View Waveform button on the Standard Toolbar) was clicked. |
| • | When the Sequence Editor's New and Open dialog is first opened, its dropdown list of folders did not include all of the immediate child folders of "My Computer". |
| • | In the Hardware Utility's Test Console, clicking the "All Off" or "All On" buttons would move the intensity sliders appropriately, but would not update the text boxes beneath them to say the new intensities. |
| • | If Windows suspended while the Sequence Editor was open, and a USB adapter was in use for an LOR comm port, then when Windows resumed, the Sequence Editor would be locked up. |
| • | The Hardware Utility would shut down without warning if "Lights Off" or "All Off" were pressed while the LOR comm port was set to a port number that could not be initialized. |
| • | The Hardware Utility would shut down without warning upon trying to initialize an X10 CM-11A device on a port that had (till that point) been assigned to LOR devices. |
This version fixes the following bugs:
| • | If the waveform display were used with a completely silent audio file, the Sequence Editor would crash. |
| • | If a sequence had a Windows shell command, and it were saved to a different filename than it had been loaded with, future changes to the Windows shell command in one of the two sequences would affect the Windows shell command in the other sequence as well. |
| • | Shows scheduled by the Simple Show Builder, and run via the PC, would not necessarily end at their appropriate time. |
This version fixes the following bugs:
| • | In certain situations, adding a sequence to an MP3 Player Showlist would fail, with an error message saying "Path/File Access error". |
| • | Sequences downloaded to an MP3 director would have their final lighting effect cut off prematurely. |
| • | The Sequence Editor's New Musical Sequence Preferences dialog would not allow you to change the default timings to certain values ("MIDI Wizard", "Beat Wizard", and "VU Wizard") if you opened the dialog via the "New Musical Sequence Preferences" menu item on the Preferences submenu of the Edit menu. |
The following changes were made for Light-O-Rama version 2.1.2:
The Light-O-Rama Software Package must now be registered with a valid license in order to unlock its full potential. There are several different license levels, each with different features available. Additionally, Light-O-Rama can be run without a license, as a Demo version; the Demo version cannot be used to actually control lights, though.
Existing customers who have purchased earlier versions of the Light-O-Rama software package are entitled to a free license of the highest level ("Advanced").
For details about registering and about the features available with the different licenses, please see Registering Light-O-Rama and Feature Comparison.
Custom Fade/Intensity Twinkles and Shimmers
In previous versions of Light-O-Rama, twinkling or shimmering the lights could only be done at full intensity. You can now use new custom tools to twinkle or shimmer the lights while fading them up or down, or at some intensity other than full intensity.
Existing Light-O-Rama controllers may need firmware upgrades to take advantage of this new feature; if a custom twinkle or shimmer is sent to a controller without the upgrade, it will react as if it were a "regular" twinkle or shimmer - i.e. it will twinkle or shimmer at full intensity.
Triggered Interactive Sequences
In addition to being able to control lights, some Light-O-Rama controllers can now act as input triggers. This allows sequences to be played on demand during a show - for example, your display may have a group of buttons that people can press, each of which will cause a different song to be played.
For details, please see the help file page "Interactive Groups".
In previous versions of Light-O-Rama, the sequences in a show would start playing immediately at the show's scheduled start time. There is now more flexibility with regards to this; for example, you could hook a big red button labeled "Start the Show" up to one of your Light-O-Rama controllers, and the show will not be started until that button is pushed.
For details, please see "Show Startup Options".
Your sequences can now be configured so that, whenever one is played, Light-O-Rama will execute any arbitrary Windows command that you associate with that sequence.
An example of how this might be useful: If you broadcast the songs playing during your show over the radio, and have hardware allowing you to broadcast RDS ("Radio Data System") information, you can now set your sequences up so that, whenever one is played, Light-O-Rama will tell Windows to tell your RDS program to broadcast the name of the song for that sequence.
For details, please see the help file page "Windows Shell Commands".
A new effect, "DMX Intensity", has been added. This can be used to specify 256 possible intensities (from 0 to 255), rather than the regular 101 possible intensities (from 0 to 100). This is useful for DMX devices, which can take up to 256 possible intensities.
Note: The DMX intensity tool is not available by default in the Sequence Editor - for example, by default, no toolbar button will be displayed for it. To enable the tool, select "Allow DMX Editing" from the DMX Preferences menu.
The Sequence Editor's new "New and Open dialog" allows you to create a new sequence, or open an existing one. This dialog is opened by default when the Sequence Editor starts up (although this behavior can be suppressed), and also when something like "New" or "Open" is selected from the File menu or the Standard toolbar.
For most sections in a show, you can now use the Show Editor to specify whether or not sequences in that section will automatically turn their lights off when they end playing.
There are two exceptions: First, the Background section does not allow this setting. Second, the Interactive section allows you to control this for each interactive group individually, rather than for the section as a whole.
Automatic Channel Settings for Newly Created Sequences
When creating a new musical sequence or new animation sequence, you now have the option to automatically configure the channels in the new sequence to use standard Light-O-Rama controllers. The first channel will be set up to use Light-O-Rama unit 1 circuit 1, the next unit 1 circuit 2, and so forth, then on to unit 2, and so forth. All such channels will be configured to use the regular LOR network.
Events Can Be Dragged with Timings
When a timing is dragged in the Sequence Editor, to change the time it is at, there is now an option to also drag any effect events that start or end at that timing along with it.
This option is controlled via the Edit menu's "Drag Events with Timings" checkbox.
Change in Behavior for Mouse Switching Tracks
Switching to another track via the mouse in the Sequence Editor now causes the selected area for that track to be set to the cell that was clicked, even if that cell is within what used to be the selected area for that track. In particular, if a tool other than "Select" is enabled, that tool will be applied to the new selection, not the old one.
Animation Sequences in Musical Section Cut Off at End of Show
In previous versions, when a show reached its scheduled end, if a sequence from the musical section of the show happened to be playing, that sequence would continue playing to its natural end before the shutdown section of the show would begin. Now, that is only the case for musical sequences; if the sequence is an animation sequence, it will abruptly stop at the scheduled end of show, regardless of the fact that it is in the musical section of the show.
"Max Units" in Hardware Utility Changed to "Max Unit ID"
When the Hardware Utility is asked to automatically detect units, it must individually search for each possible unit ID. This may take some time to do. To speed this up, the Hardware Utility allowed you to specify a maximum number of units to search for, in a box labelled "Max Units". For example, if you set "Max Units" to "3", the Hardware Utility would search for a controller with unit ID 01, another with unit ID 02, and a third with unit ID 03. It would not check for any unit IDs past 03. However, this often led to the following confusion:
Unit IDs are given in hexadecimal notation. So, for example, the next unit ID after 09 is not 10, but 0A. That is followed by 0B, 0C, 0D, 0E, and 0F, and only then does 10 come. So, if a person's highest unit ID was 10, they might be mislead to thinking that they should input "10" into "Max Units". But "Max Units" was merely a count, not an ID, meaning that the Hardware Utility would only search for the first ten possible unit IDs, i.e. 01 through 09 and 0A. Therefore, unit 10 would not be found (as it is actually the sixteenth possible unit ID).
To get rid of this common source of confusion, "Max Units" was changed to "Max Unit ID". So now, for example, entering "10" will search for unit IDs 01 through 09, unit IDs 0A through 0F, and unit ID 10.
This release fixes the following issues:
| • | If the Play Again button on the Standard Toolbar of the Sequence Editor were hit quickly two times in succession, an error message box would appear. |
| • | If the "turn a channel on and off" feature of the VU Wizard were used on only part of a musical sequence, it would correctly turn the channel on and off in that part, but would additionally turn everything in the channel past that part off. |
| • | In certain situations, when scrolling through tracks in the Sequence Editor, the track bar for some tracks would not be displayed, and instead part of the previously displayed channel grid would be displayed where the track bar should have been. |
| • | If certain Light-O-Rama entries in the Windows registry were mistakenly deleted (for example, by a third-party registry cleaning program), and a musical sequence were modified and saved, the name of the sequence's media file would not be saved along with it, and you would be unable to modify the sequence again to tell it the name of the media file. This effectively means that the musical sequence would be "transformed" into an animation sequence. This no longer occurs. Note, though, that Light-O-Rama still might not be able to play the sequence, as those registry entries tell it where to look for media files. But after the issue with registry is corrected, Light-O-Rama will now play those musical sequences as normal. |
| • | If a sequence had a channel that was set up to be a Light-O-Rama controller, but did not have its unit ID set, that sequence would not play in the Show Player. |
| • | Removing a channel that was in more than one track from a track would not cause the sequence to be marked as having unsaved changes. |
| • | If paste by cell is enabled, and effect events copied from a larger cell are pasted to a smaller cell, those events are "shrunk" to fit into the smaller cell. If such an event had to be shrunk to less than a centisecond in length, pasting would fail, giving an error message "Start time cannot be less than end time". Now, events shrunk to less than a centisecond are simply skipped when pasting. |
| • | When creating an SD card for an MP3 Director, a valid COM port is no longer required. |
| • | Some machines were having problems downloading standalone sequences to controllers. The reliability of downloading has now been improved. |
| • | When setting a unit ID via the Hardware Utility, the dropdown boxes allowing you to select a unit ID only show unit IDs from 01 up to the unit ID specified in the Hardware Utility's "Max Unit ID" setting. Previously, though, changing "Max Unit ID" would not change the values listed in the dropdown boxes, until the Hardware Utility was closed and then restarted. Now, the new values will be available immediately, without needing to close and restart. |
The following changes were made for Light-O-Rama version 2.0.16:
Previous releases of Light-O-Rama version 2 included the same Simple Show Builder as was used in Light-O-Rama version 1. It therefore could not be used with sequences that were created using the version 2 Sequence Editor.
Simple Show Builder has now been updated so that it can be used with sequences that were created using either version 1 or version 2.
This release fixes the following issues:
| • | Various tools such as the Beat Wizard, VU Wizard, and Waveform Display had problems with certain audio files, resulting in an error message saying "Can't init conversion" appearing, after which these tools would be unusable with those files. This release fixes this issue (at least in the known situations that it happened in). |
| • | The Beat Wizard would crash when used with certain audio files on some customers' machines. |
| • | If either "Close All Files" or "Close All Files Except This" was used, and one of the sequences being closed had its Animator window open, an error message would pop up saying "Error Loading Animation Form". |
The following changes were made for Light-O-Rama version 2.0.14:
Two new play ranges have been added to the Sequence Editor: "From Selection" plays from the start of the selection to the end of the sequence, and "To Selection" plays from the start of the sequence to the end of the selection.
You can now use the keyboard to select an arbitrary time range for future playing. Please see "Freeform Play Mode" for details.
Space Bar To Play; Enter To Apply Tool
In the Sequence Editor, the space bar can now be used to start a sequence playing, and then to stop it. If a freeform play range has been selected, that range will be played; otherwise, play will be in "from selection" mode - that is, it will start at the start of the current selection, and go until the end of the sequence. This can be used to effectively pause and unpause play.
In previous versions of Light-O-Rama, the space bar was used to apply the current effect tool to the selected cells. That is now done using the enter key instead.
The Sequence Editor can now subdivide the selected cell or cells into a new number of cells (which you select). Each cell is subdivided into the specified number of cells, and all of the new cells within any particular old cell will be of the same length (or as close to the same length as possible).
For example, if you select two cells, the first from 3 seconds to 7 seconds, and the second from 7 seconds to 7.5 seconds, and ask the Sequence Editor to subdivide them into two cells each, you will wind up with four cells: From 3 to 5, from 5 to 7, from 7 to 7.25, and from 7.25 to 7.5.
This can be done via "Subdivide Timings" on the Timings submenu of the Edit menu, or via "Subdivide Timings" on the right-click context menu.
The Edit menu of the Sequence Editor now has a new menu item, "Skew Track". This lets you move all of a track's events, timings, and loops by a specified amount of time, either to the left (i.e. earlier in time) or to the right (i.e. later in time).
In previous versions of Light-O-Rama, the waveform of a musical sequence was either displayed or not. Now, if it is displayed, it can be displayed at two different heights: full height and half height. Full height is the same as the height that was used in previous versions of Light-O-Rama.
Half height and full height (and "off") can be selected from the Wave Form submenu of the View menu.
The waveform of a musical sequence can now be displayed in three different ways: "full mode", showing zero volume at the center and loud volumes above and below it; "fold mode", showing zero at the bottom and folding the two halves of full mode onto the top; "top mode", showing zero at the bottom and the top half of full mode above it. "Full mode" is the same as the way the waveform was always displayed in previous versions of Light-O-Rama.
To set the display mode, right-click on the waveform, and select the desired mode from the listed choices in the popup menu.
The colors used to display the waveform of a musical sequence are now configurable. To choose new colors, right-click on the waveform, and select "Change Colors" from the popup menu.
This release fixes the following issues:
| • | In the Channel Property Grid, if a channel was set up with a device type but no unit number and/or circuit number, it might later be displayed (in both the Channel Property Grid and the Channel Settings dialog) as if it had a unit number and/or circuit number set (although it still did not). |
| • | When printing from the Channel Property Grid, unit numbers of some Light-O-Rama controllers would be mislabelled, as would device types of certain non-Light-O-Rama controllers. |
| • | If a sequence was changed, but not yet saved, and "Revert to Saved" was selected from the File menu, the sequence would be properly reloaded, but could not be played again until it was closed and reopened. |
| • | Several dialog windows had a problem where, if the dialog was closed by hitting the enter key rather than by clicking the OK button, changes to the last field modified might not be acted upon. |
| • | If a channel was in two or more tracks, and had a shimmer effect, the effect would not be displayed properly in the Animator. |
| • | If a sequence was playing in the Sequence Editor, and some other sequence was not playing but had its Animator open, clicking on that Animator's play button would set off a string of errors. Now, instead, it simply does not start play (while the other sequence is playing). |
| • | Highlight Current Event on the Play menu is supposed to control whether or not the current event is displayed with a thick border (as if it were the selection) during play. It did so, but it also mistakenly controlled whether the selection was displayed or not while play was not happening. |
| • | If a musical sequence's media file did not have its "Ready for Archiving" flag turned on (in the file's properties in Windows Explorer), the Sequence Editor would not play the sequence, complaining that the media file could not be found. |
| • | If the Sequence Editor played a musical sequence at quarter, half, double or quadruple speed, and the directory its media file was in contained a period in its name, sometimes the wrong media file would be played. |
This release fixes the following issues:
| • | A show would pause indefinitely if the Show Player was asked to play a musical sequence whose media file was missing. |
| • | Musical sequences played during the startup and shutdown sections of a show would control the lights, but would not play audio. |
| • | Commands for X10 channels were often getting lost. |
This release contains the following bug fixes:
| • | The Tapper Wizard's dropdown list allowing you to select the track to use did not work properly, leading to the taps being put into whatever track had been selected at the time that the Tapper Wizard was opened, rather than into the one that was selected in the list. |
| • | The VU Wizard's option to operate on only a portion of the song, as opposed to the entire song, did not work properly. |
| • | Importing channel configuration into a sequence did not mark that sequence as having unsaved changes. |
| • | Communication with the controllers is kept alive during the loading of sequences. This is to fix an issue where, after the loading of a large sequence, the PC would have to resynchronize with the controllers due to communication having been paused. This resynchronization could have taken some time, causing strange effects immediately after synchronization. |
| • | If an error occurs while communicating with the controllers, Light-O-Rama tries to reestablish communications, in the hopes that the error was merely a temporary glitch. However, for certain types of errors, it would not try to do so, leading to the communications being permanently down. |
Version 2.0.4 fixes a bug where X10 channels were not being controlled during shows.
The following new features, changes, and fixes have been made for Light-O-Rama version 2.0.0:
Previously, a sequence was composed of channels, loops, and timings. Now, instead, a sequence is composed of tracks. Tracks, in turn, have channels, loops, and timings.
Two tracks in the same sequence can have different channels, or they can share channels with each other. They have different sets of loops and timings than each other. In an animation sequence, tracks can be of different lengths than each other.

Two tracks, with the same channels, in one sequence
A brief example of how this may be useful:
In a musical sequence, you may want to have some timings representing a bass drum, other timings representing a guitar, and yet another representing something totally unrelated to the song. Before tracks, in Light-O-Rama version 1, you could add all of these timings to your sequence, but it might be difficult to remember, while building the sequence, which timings were for which purpose. The more unrelated timings that you added to the sequence, the more confusing the sequence as a whole would become.
Now in Light-O-Rama version 2, instead, you can build a single sequence with multiple separate tracks, each with only one of those sets of timings, making each set of timings cleaner and simpler to understand. Plus, you can share channels between two or more tracks, have different channels in different tracks, or both.
Sequences are initially created with a single track. Another track can be added via the Edit menu's "Add New Track" or "Duplicate Track" items (the latter of which will share all channels in the current track with the new track), or via new items on the channel buttons' popup menus ("Copy to New Track" and "Move to New Track").
To share an individual channel between multiple tracks, do not simply set two different channels to use the same unit number, circuit number, et cetera, as this will likely have unexpected and undesired results. Instead, use the "Copy to New Track" or "Copy to Track Number ..." function on the channel's popup menu:

Share a channel with another track by copying it to the other track
If a sequence has more than one track, the tracks are separated in the display by a track bar, labelled (for example) "Track 1" or "Track 2". If the track has been given a name, it will also be displayed here (for example, "Track 2: Front Yard Mini-trees"). Clicking on this bar gives a popup menu containing various track-related items:

Click on a track bar for various track-related menu items
A channel in a sequence can now be set to represent another sequence (rather than representing a physical circuit), known as a "subsequence". This is done in the Channel Settings dialog, by changing the "Device Type" to "Sequence" (rather than to "Light-O-Rama Controller", "Digital IO Card", or so forth), and choosing the filename of the sequence in the "Sequence" box:

Channel settings for sequence-in-sequence play
A subsequence will play only when the channel that it is a subsequence of is turned on, and will continue playing as long as the channel is on. If the channel is turned off and then turned back on, the subsequence will start over from its beginning.
TIP: Don't try to control the same physical circuit with both a channel in a subsequence and a channel in the main sequence. Doing so will probably cause unexpected results, as the two channels will vie for control of the circuit.
Background and Foreground Effects
Turning on background effects or foreground effects in the Sequence Editor will affect the behavior of tools (such as "Fade Up", "Twinkle", "Set Intensity", et cetera) in the following manner:
If "Background Effects" has been turned on, the tool only applies to those selected cells that are completely off (that is, at intensity zero for their entire duration).
If "Foreground Effects" has been turned on, the tool only applies to those selected cells that are not completely off.
Some examples:

Before a background fade up

After a background fade up
Before a foreground fade up

After a foreground fade up
The Sequence Editor's undo and redo used to only work for the effect tools (such as "on", "off", "fade up", "twinkle", and so forth). You can now undo and redo a much wider variety of things - adding channels, moving timings, changing loops, drawing in the Animator, and many others.
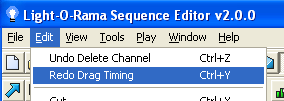
Examples of things that can be undone and redone
Channels can now be moved up and down in the Sequence Editor. There are two ways to do this: First, the channel buttons' right-click popup menu now includes "Move Up" and "Move Down", which will move the channel by one spot. Second, a channel button can now be mouse dragged to a new position.
The mouse scroll wheel now works in the Sequence Editor. Scrolling with the wheel causes the displayed channels in the active sequence to scroll.
Pasting Timings between Sequences
Previously, timing ranges copied from a sequence could only be pasted into that same sequence. Now, a timing range copied from one sequence can be pasted into a different sequence.
The Show Player and the Sequence Editor can now use video files (in addition to the previously available audio files) to create sequences. The video output can be displayed during play.
In the Sequence Editor's Edit/Preferences menu, there is now a new item called "Video Preferences", which gives control over how video files will be used (both in the Sequence Editor and during scheduled shows):

Edit/Video Preferences
These options can also be temporarily changed in the Sequence Editor via the View/Video menu. However, changes made this way will only affect the Sequence Editor (not the Show Player), and will only last during the current use of the Sequence Editor - that is, the next time that the Sequence Editor is started, the video preferences as set in "Edit/Preferences/Video Preferences will be used again).

View/Video
The Sequence Editor's Set Intensity, Fade Up and Fade Down tools now have ten preset values (or ranges). The old "Tool Options" dialog was replaced with the Fade Tool Settings and Intensity Tool Settings dialogs to set these presets:

Intensity Settings, with 70% selected
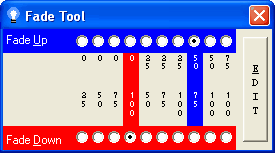
Fade Settings, with fade up 50-75% and fade down 100-0% selected
The Sequence Editor comes with default preset values (such as 10%, 20%, and so forth) build in; if you want to change any of the presets, you can do so by clicking the settings tool's "EDIT" button:

Changing an intensity preset to 37%

The preset has now been changed to 37%
The values of the presets for both intensities and fades can also automatically be set using Load Intensities and Fades from Current Sequence, of the Tools menu. This will figure out the most commonly used percentages for both intensities and fades existing in the current sequence, and set the preset values to them.
The Sequence Editor's new Beat Wizard can be used to automatically analyze a song to try to determine its beat, and to populate a musical sequence with timings or effects based upon that beat. The Beat Wizard can be found in the Sequence Editor's Tools menu. It is also available as one of the options for creating a new musical sequence, and for creating a new track.

The Beat Wizard
The Sequence Editor's new VU Wizard is a VU meter-like tool that can be used to automatically populate a musical sequence based upon peaks in the audio. The VU Wizard can be found in the Sequence Editor's Tools menu, and is also available as one of the options for creating a new musical sequence, and for creating a new track.
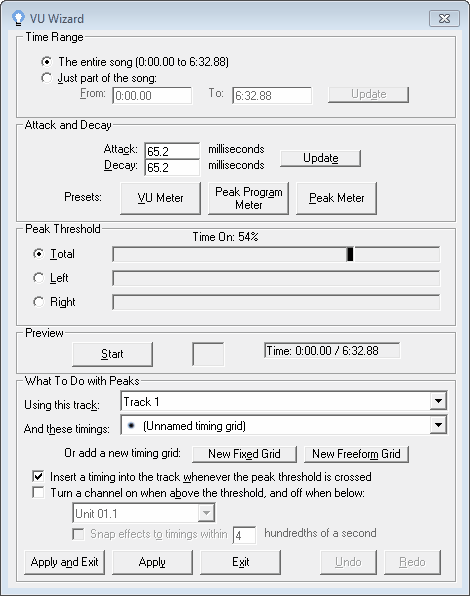
The VU Wizard
Recording of Individual Instruments in the MIDI Wizard
The MIDI Wizard can now automatically create lighting effects for a musical sequence based on the notes played by individual instruments in a MIDI file.
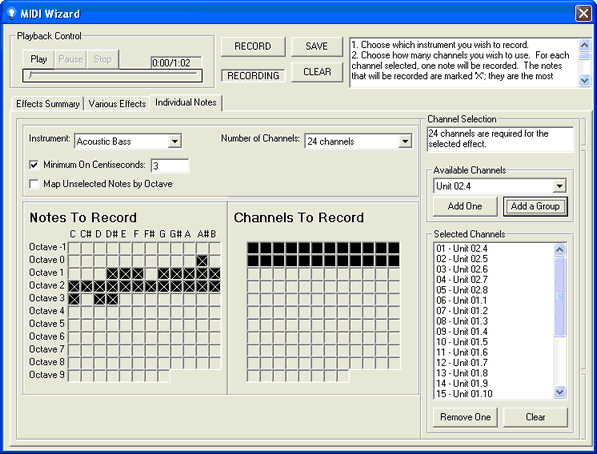
The MIDI Wizard's can automatically create lighting effects based on the notes played in a MIDI file
Multiple Light-O-Rama Networks
Previously, only a single COM port could be used for Light-O-Rama controllers. Now, up to four Light-O-Rama networks can be used simultaneously on the same computer, on different COM ports.
The same unit and circuit number can be used on multiple networks simultaneously and independently, with different effects happening on the different networks.

Up to four different networks can be used for LOR controllers
Various new media file types (including Windows Media Files and certain types of videos) are now supported for musical sequences.

Various supported media types
A sequence's animation can now be set up to have a background image, such as a picture of a house on which Christmas lights are to be placed.

The Animator, with a background image
The Sequence Editor's new Channel Property Grid is a window showing information about all of the channels in a sequence (their color, device type, unit number, et cetera), and allowing changes to those properties in a (hopefully) convenient manner. This can be accessed via the Sequence Editor's Tools menu.

The Channel Property Grid
Pasting Effects: By Time or By Cell
When pasting effects in the Sequence Editor, you can now choose to insert the events into the destination based upon either the length of the copied events or else the relative lengths of the copied and destination cells.
For example, consider timings at 0 seconds, 1 second, and 2 seconds. Between 0 and 1 is a fade up, and between 1 and 2 is a fade down:

Events to be copied
These events will be copied, and pasted to the time starting at 5 seconds. There are timings at 5 seconds, 7 seconds, and 7.5 seconds:

Where they will be pasted to
If "Paste by Cell" is selected, then there will be a fade up from 5 to 7, and a fade down from 7 to 7.5 (this is the same way that pasting always behaved in version 1 of Light-O-Rama):

After pasting by cell
If "Paste by Time" is selected, then there will be a fade up from 5 to 6, and a fade down from 6 to 7. The timings at 7 and 7.5 are ignored; only the original lengths of the events are used:

After pasting by time
You can switch between these two modes by selecting "Set Paste Mode" in the Sequence Editor's Edit menu.
Holiday Lights Designer™ Support
Light-O-Rama can now interact with Holiday Lights Designer™, a third-party application by Holidaysoft®.
Holiday Lights Designer™ can be used to virtually place lights and decorations on images of your home or business, and Light-O-Rama can now send Holiday Lights Designer™ commands during play to make those virtual lights behave as your real lights would during a show.
To send commands to Holiday Lights Designer™, first set the Holiday Lights Designer Preferences in the Sequence Editor under the Edit menu. After this is done, commands can be sent from the Sequence Editor by turning on "Control Holiday Lights Designer" in the Play menu, or from the Show Player by selecting "Holiday Lights Designer On" in the Light-O-Rama Control Panel.
Version 4.0 or above of Holiday Lights Designer™ is required to take advantage of Light-O-Rama interaction.
For more information about Holiday Lights Designer™, please see the Holidaysoft website.
Sequence files (and channel configuration files) are now saved as XML files. LOR 2 understands both these new sequence files and the old LOR 1 style sequence files.
If an LOR 1 file is modified and saved by LOR 2, it is automatically updated to the new LOR 2 style. This means that LOR 1 will no longer understand the updated file. However, to be safe, a copy of the original LOR 1 save file is automatically created, and labelled as an LOR 1 file. For example, if the LOR 1 sequence file "lights.las" is converted to an LOR 2 file, then a copy of the original LOR 1 file will be created, named "lights.las.v1.bak".
Microsoft Windows Vista Support
Various changes were made to better support Light-O-Rama on the Microsoft Windows Vista operating system.
Animator Window CPU Usage Decreased
The Sequence Editor's Animator window now uses significantly less CPU during play than it used to.
Animator's Maximum Rows and Columns Increased
The Animator window now supports up to two hundred rows and columns:

Animation with 200 rows and 200 columns
Sequence Editor's Keyboard Support Improved
Several changes were made to make using the keyboard easier in the Sequence Editor. For example:
| • | The "enter" key now chooses the "OK" button on most forms; |
| • | The "escape" key now chooses the "Cancel" button on most forms; |
| • | The "tab" key circulates between controls in a more sane order; |
| • | Many Alt-key shortcuts were added to various forms; |
| • | The various menus were reorganized so as to cause less conflict among their various items' shortcut hotkeys. |
New Look for the Shimmer Effect
The shimmer effect is now drawn (in the Sequence Editor) using diagonal lines, instead of the previous vertical lines. This will hopefully make them stand out more against the background of vertical lines which represent timings.
Note that this change is simply for display of the sequence in the Sequence Editor; the actual appearance of the shimmer effect on controlled lights is unaffected by this.

Some channels with shimmer effects
Channel Settings Form Directly Accessible via the Channel's Button
In the Sequence Editor, left-clicking and right-clicking on a channel button used to both bring up a context menu of channel-related functions (such as adding, deleting, and moving channels). Right-clicking still does that, but left-clicking now brings up the channel's settings form instead:

The Channel Settings form
Bug Fixes and Internal Improvements
Several bug fixes have been made, including but not limited to the following:
| • | If a show includes a musical cleanup sequence, it is supposed to be played after each song. Instead, it was being played only at the end of the show, just before the first shutdown sequence. |
| • | Some musical sequences, when played in the Sequence Editor, would reach the end of their audio file, but would not cause the Sequence Editor to exit from play mode. |
| • | Certain audio files would not play their audio. |
| • | The Sequence Editor incorrectly determined the total length of certain audio files. |
| • | When a musical sequence was played in the Sequence Editor using the "Visible Screen" play range, the display would sometimes jump to an adjacent portion of the sequence, rather than remaining on the initially visible portion of the sequence. |
| • | Attempting to delete the first timing in a sequence (at time zero) would cause the Sequence Editor to crash. |
| • | Attempting to resize multiple timings (simultaneously) using the Sequence Editor's "Resize Timings to ..." function (on the right-click popup menu) would cause the Sequence Editor to crash if the sequence happened to be more than 5:27.67 long. |
| • | When the Sequence Editor displayed fades using gradual changes in colors (as opposed to when it displayed them using ramps), it would sometimes draw the end of a fade event past where it should have been. |
| • | The Tapper Wizard's option to not use a countdown before the song begins did not work. |
| • | When a sequence was playing at a speed other than the normal speed (for example, through the "Play Speed" menu item in the Sequence Editor, or due to a loop that was set up to increase or decrease speed each time through), if a fade up or a fade down was done, the lights would not properly take the speed of the sequence into account when determining how quickly to fade. For example, a fade up from 0 to 100% that normally takes one second, played at half speed, should fade up from 0 to 100% in two seconds. Instead, it would fade up from 0 to 100% in the first second, and then remain at 100% for the entire second second. |
| • | When the Cleanup or Delay portion of a show was modified in the Show Editor, the Save button would not become enabled. |
| • | The Sequence Editor's audio waveform display (and its positioning line) did not exactly match up with the time of the rest of the display. This was especially noticeable at very high zoom levels. |
| • | When moving a timing in a sequence by clicking and dragging it in the Sequence Editor, sometimes the timing before the selected one would be moved. |
| • | When a musical sequence was opened in the Sequence Editor, and the "View Wave Form by Default" option was selected, if the sequence's audio file no longer existed (or otherwise could not be opened), the Sequence Editor would crash. |
| • | If a musical sequence was played in the Sequence Editor, and the sequence's audio file no longer existed (or otherwise could not be opened), nothing would appear to happen. The Sequence Editor now instead shows an error message box describing the problem. |
Various internal improvements have been made as well.
The following new features, changes, and fixes have been made for Light-O-Rama version 1.5.0:
When the Tapper Wizard's "toggle" and "snap to existing events" options are used together, both the beginning time and the end time of each toggle are snapped to existing events. This causes the combination to behave in a way that is probably more similar to what most people would expect.
Various problems occurred when the last channel in a sequence was deleted. These have been fixed.
Channel Button Feedback during Loops Fixed
When the Sequence Editor was used to play a sequence with a loop, and the end of the loop was reached, just before going back to the beginning of the loop, the channel buttons' color displays would sometimes briefly act upon the event just after the loop. This has been fixed. Note that it did not affect the actual display of lights; it only affected the display within the Sequence Editor itself.
If the Animator was sized so that scroll bars were necessary, the "draw" and "erase" functions would act upon the wrong cells. This has been fixed.
In the Sequence Editor, at the top of each sequence, a time scale is optionally displayed. Also, during play, the button to the left of this scale now displays the current time offset.
Whether the time scale is displayed or not for any particular sequence can be controlled via the View menu, or via a button on the toolbar. It can be turned on or off by default using the Display Preferences dialog on the Edit menu.
In the Sequence Editor, you can now copy and paste timings - that is, make new cells having the same duration and relative positions as some existing timings.
To copy a set of timings, select the range of cells that you want to copy, and then copy them in one of three ways:
| • | Select "Copy Timing" from the Edit menu; |
| • | Select "Copy Timing" from the right-click context menu; |
| • | Using the keyboard, hold the "Shift" key and simultaneously hit the "Delete" (or "Del") key. |
Once these timings are copied, you can paste them in one of several ways:
| • | Via the right-click context menu: |
| • | "Paste timing at ...", which brings up a dialog box asking the centisecond to paste to (defaulting to the centisecond that was right-clicked"); |
| • | "Paste timing multiple", which is similar, but also asks how many times you would like to paste the timings consecutively, or if you wish to keep pasting them all the way to the end of the file. |
| • | Via the Edit menu, using "Paste Timing". This is the same as the right-click menu's "Paste timing multiple", except that the starting centisecond defaults to the start of the current selection, rather than the right-clicked centisecond. |
| • | Using the keyboard, hold the "Shift" key and simultaneously hit the "Insert" (or "Ins") key. This is the same as "Paste Timing" from the Edit menu. |
Animation Saved in Channel Configuration Export
When a sequence's channel configuration is saved (using "Export Channel Configuration" from the Edit menu of the Sequence Editor), the sequence's animation is saved along with it. When the channel configuration is later imported into another sequence (using "Import Channel Configuration" from the same menu), the user is given the option to import the animation as well.
Right-Click in Animator Now Erases
The right mouse button can now be used to erase cells in the Animator.
The status bar along the bottom of the Sequence Editor now shows not only the total time and selected time range, but also the duration of the selected time range.
You can now tell the Sequence Editor to "play again". This causes it to play the last thing that you asked it to play, regardless of the current play settings. For example, if you choose a certain time range, with the play range set to "Selection", the Sequence Editor will play that selection. After play ends, you may fix some problem that you noticed, which causes the selected time range to change. If you wanted to play the same time range again, previously, you would have to re-select that time range. Now, you can instead simply hit "Play Again".
There are two ways to do this: Via the "Play Again" item of the Play menu, and via a new toolbar button.
Several zoom improvements have been made in the Sequence Editor:
| • | The "Zoom In" and "Zoom Out" buttons on the toolbar have been replaced by individual buttons for "Zoom Channels In", "Zoom Channels Out", "Zoom Time In", and "Zoom Time Out". |
| • | Preferred zoom settings can now be saved or restored via the Zoom Preferences dialog on the Edit menu. The saved zoom preferences are used by default when opening or creating new sequences. |
| • | Keyboard shortcuts now exist to zoom in various directions: Alt-Up and Alt-Down to zoom channels in and out, and Alt-Left and Alt-Right to zoom time in and out. Also, Alt-Page-Up and Alt-Page-Down to go to the minimum or maximum channel zoom settings, and Alt-Home and Alt-End for the minimum and maximum time zoom settings. |
In the Sequence Editor, several timings can now be deleted at once, by selecting a range of timings and choosing "Delete Selected Timings" from the right-click context menu.
The Animator has been made more efficient, using less CPU during play. This improves the jerkiness that was seen on some machines during play while the Animator window was open.
When you manually stop play of a sequence (as opposed to letting it stop by reaching its natural end), the Sequence Editor now continues to display the screen that was being displayed when play was stopped.
Program's Main Window Remembers Its Position
When you start the Sequence Editor, its main window is now opened in the same position that it was in the last time it was closed.
Bug Fixes, Internal Improvements
Several bug fixes and internal improvements have been made.